GitHub Preview Deploy
Preview deployments allow Coolify to automatically deploy new versions of your application whenever someone opens a pull request (PR) on your GitHub repository.
These preview deployments are automatically deleted once the associated pull request is merged or closed, ensuring a clean environment.
Features
- Scoped Deployments: Control who can trigger PR preview deployments.
- Scoped Secrets: Keep production and preview environment variables separate.
- Automated Comments: Post deployment status updates directly on pull requests.
Preview Deployments Options
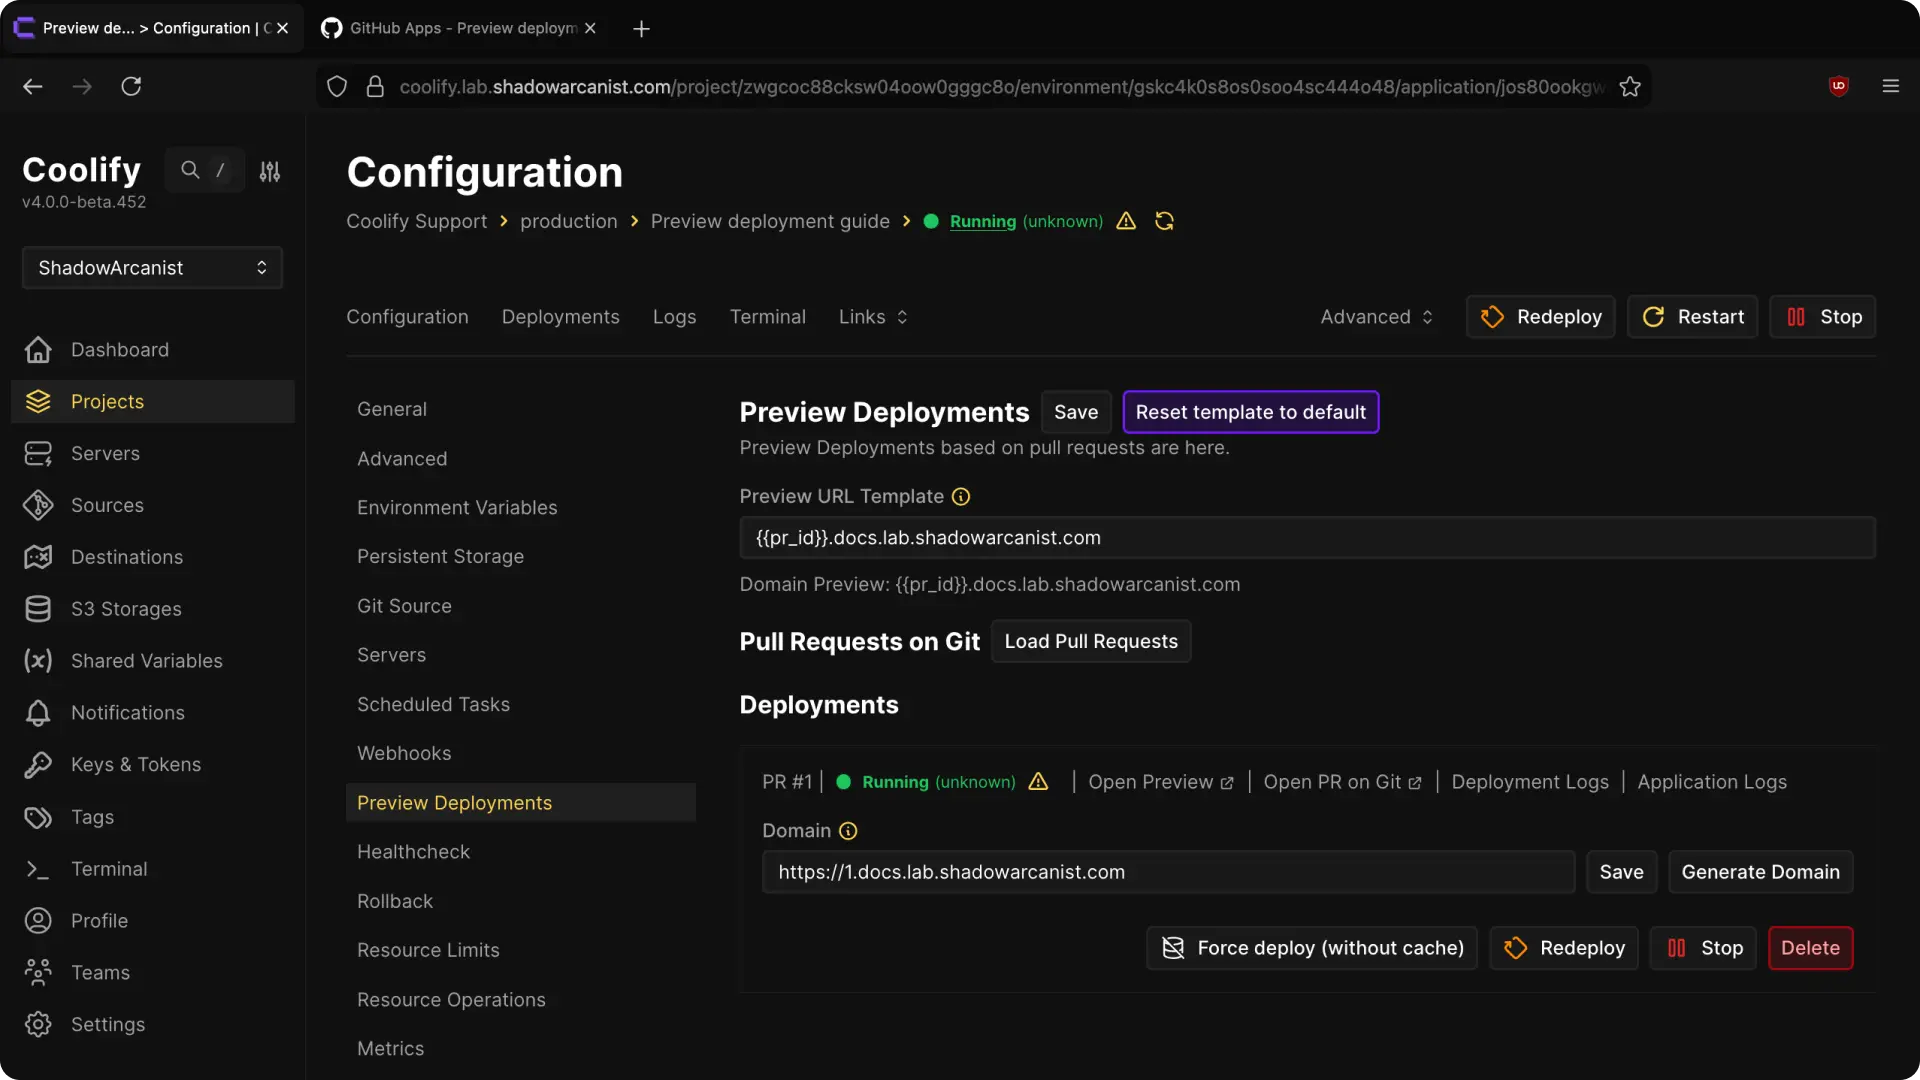
- Preview URL Template: Each preview deployment gets its own unique URL based on this template.
- Use
{{random}}to generate a random subdomain each time a PR is deployed. - Use
{{pr_id}}to use the pull request ID as the subdomain.
- Use
IMPORTANT
You need to set up a wildcard A record for the subdomain you want to use for preview deployments, pointing to your server's IP address. For example, to use https://123.preview.shadowarcanist.com, create an A record for *.preview.shadowarcanist.com pointing to your server's IP address.
- Load Pull Requests: Allows you to manually fetch all open pull requests on your repository. This is useful if you already had open PRs before setting up preview deployments.
INFO
Coolify does not automatically deploy preview deployments for pull requests that were opened before preview deployments were enabled. You need to manually deploy these by clicking the 'Deploy' button on the pull request list in the Preview Deployments page.
Scoped Deployments
If anyone can trigger a new preview deployment by creating a pull request, they could run arbitrary code directly on your environment, potentially gaining access to your environment or secrets.
Coolify allows you to configure who can trigger new preview deployments to prevent this:
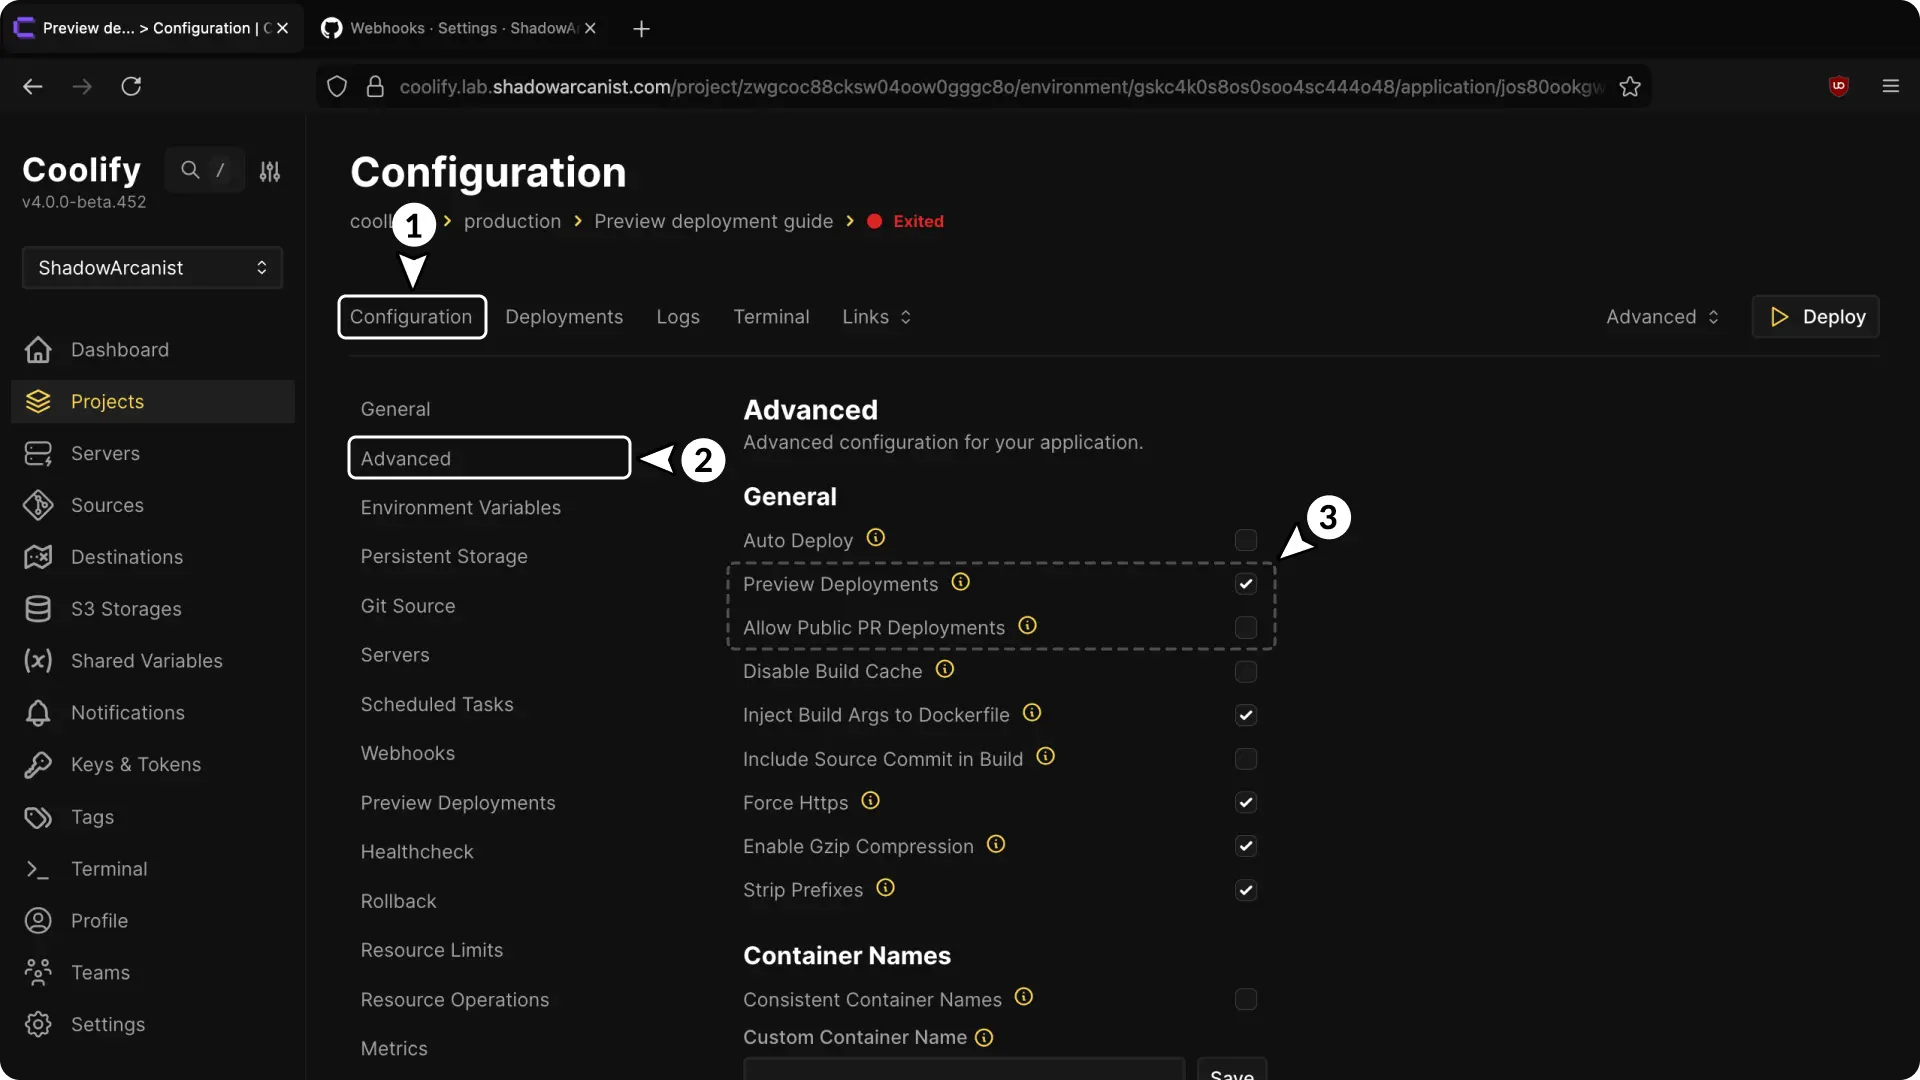
- Preview Deployments: Enables the Preview Deployments feature, and only repository members, collaborators, and contributors can trigger PR deployments.
- Allow Public PR Deployments: Anyone can trigger PR deployments.
Scoped Secrets
Coolify separates environment variables for production and preview deployments, keeping your secrets safe.
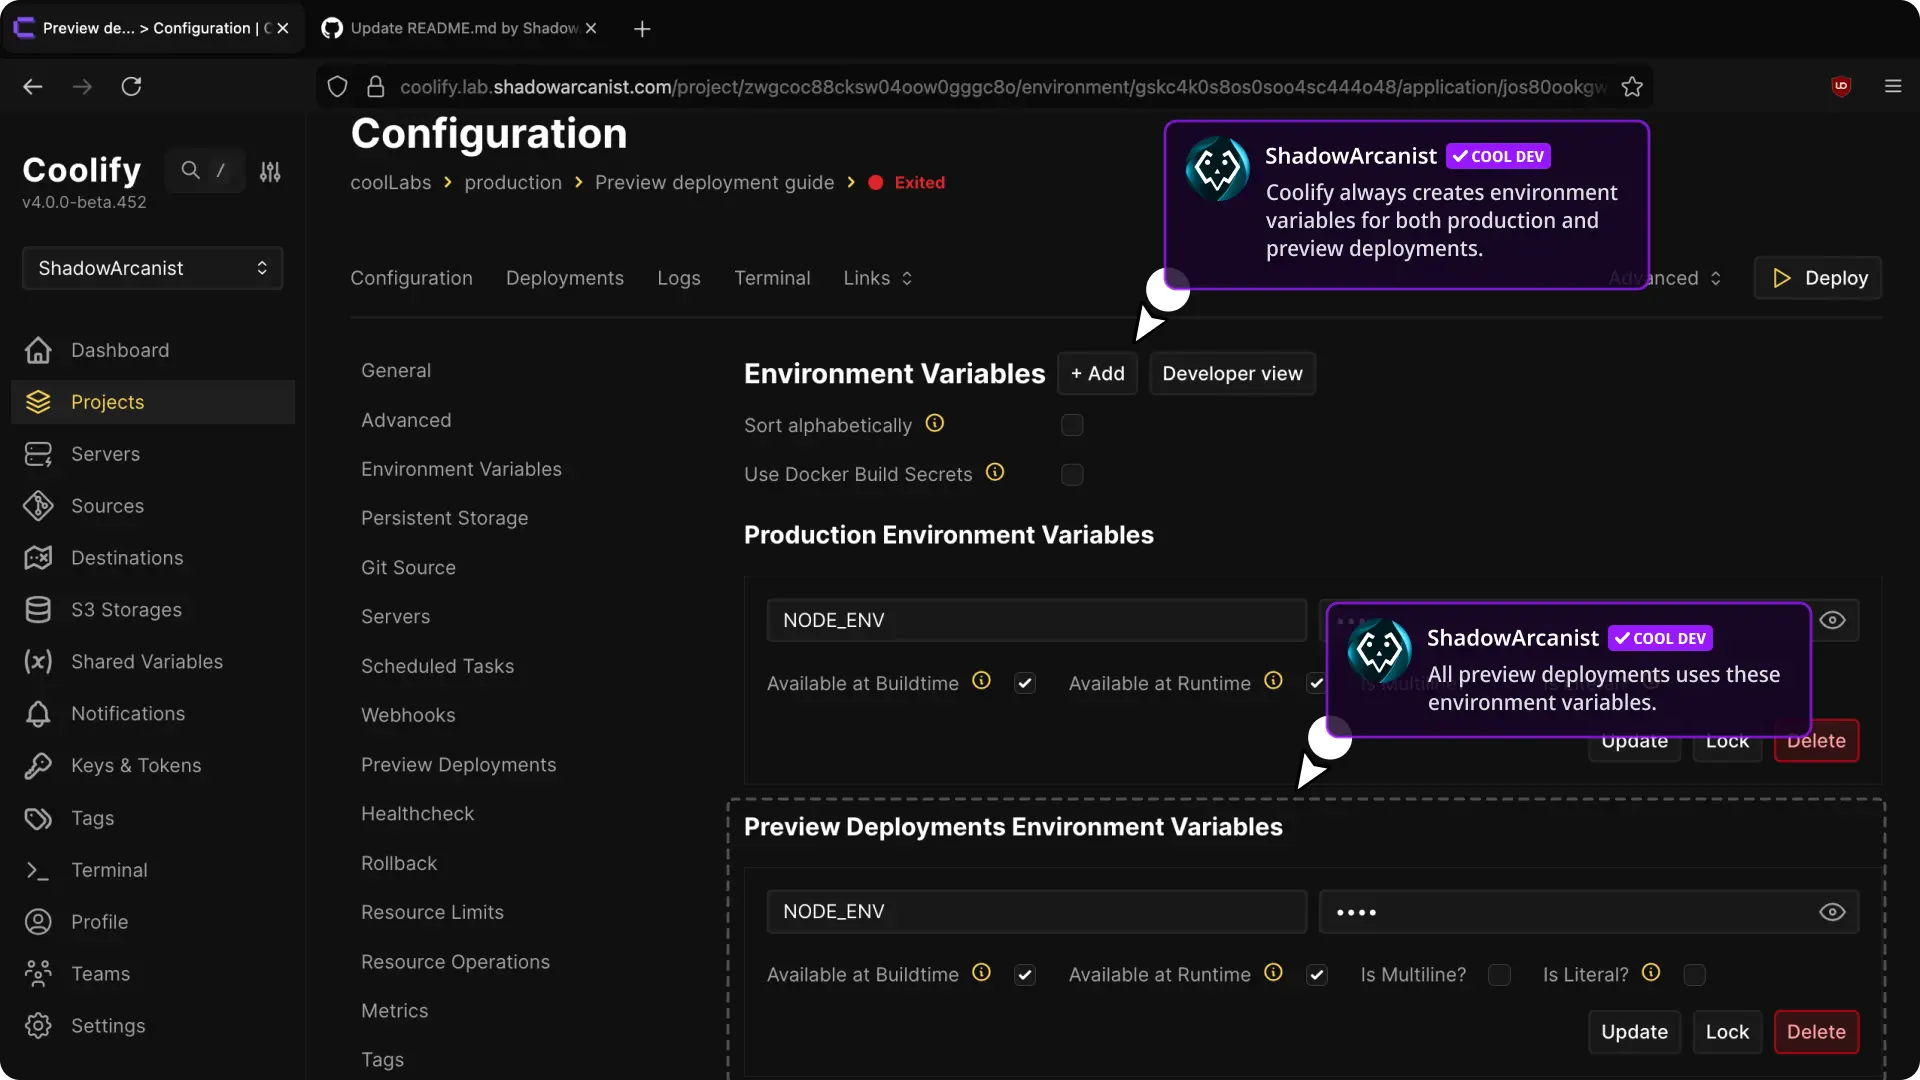
- Production Environment Variables: These variables are used only in your main deployment. They remain fully isolated and are never exposed to preview deployments triggered from pull requests.
- Preview Deployment Environment Variables: A separate set of variables used only for PR-based preview deployments. These variables can safely contain non-sensitive or limited-scope values, ensuring contributors' pull requests cannot access production secrets.
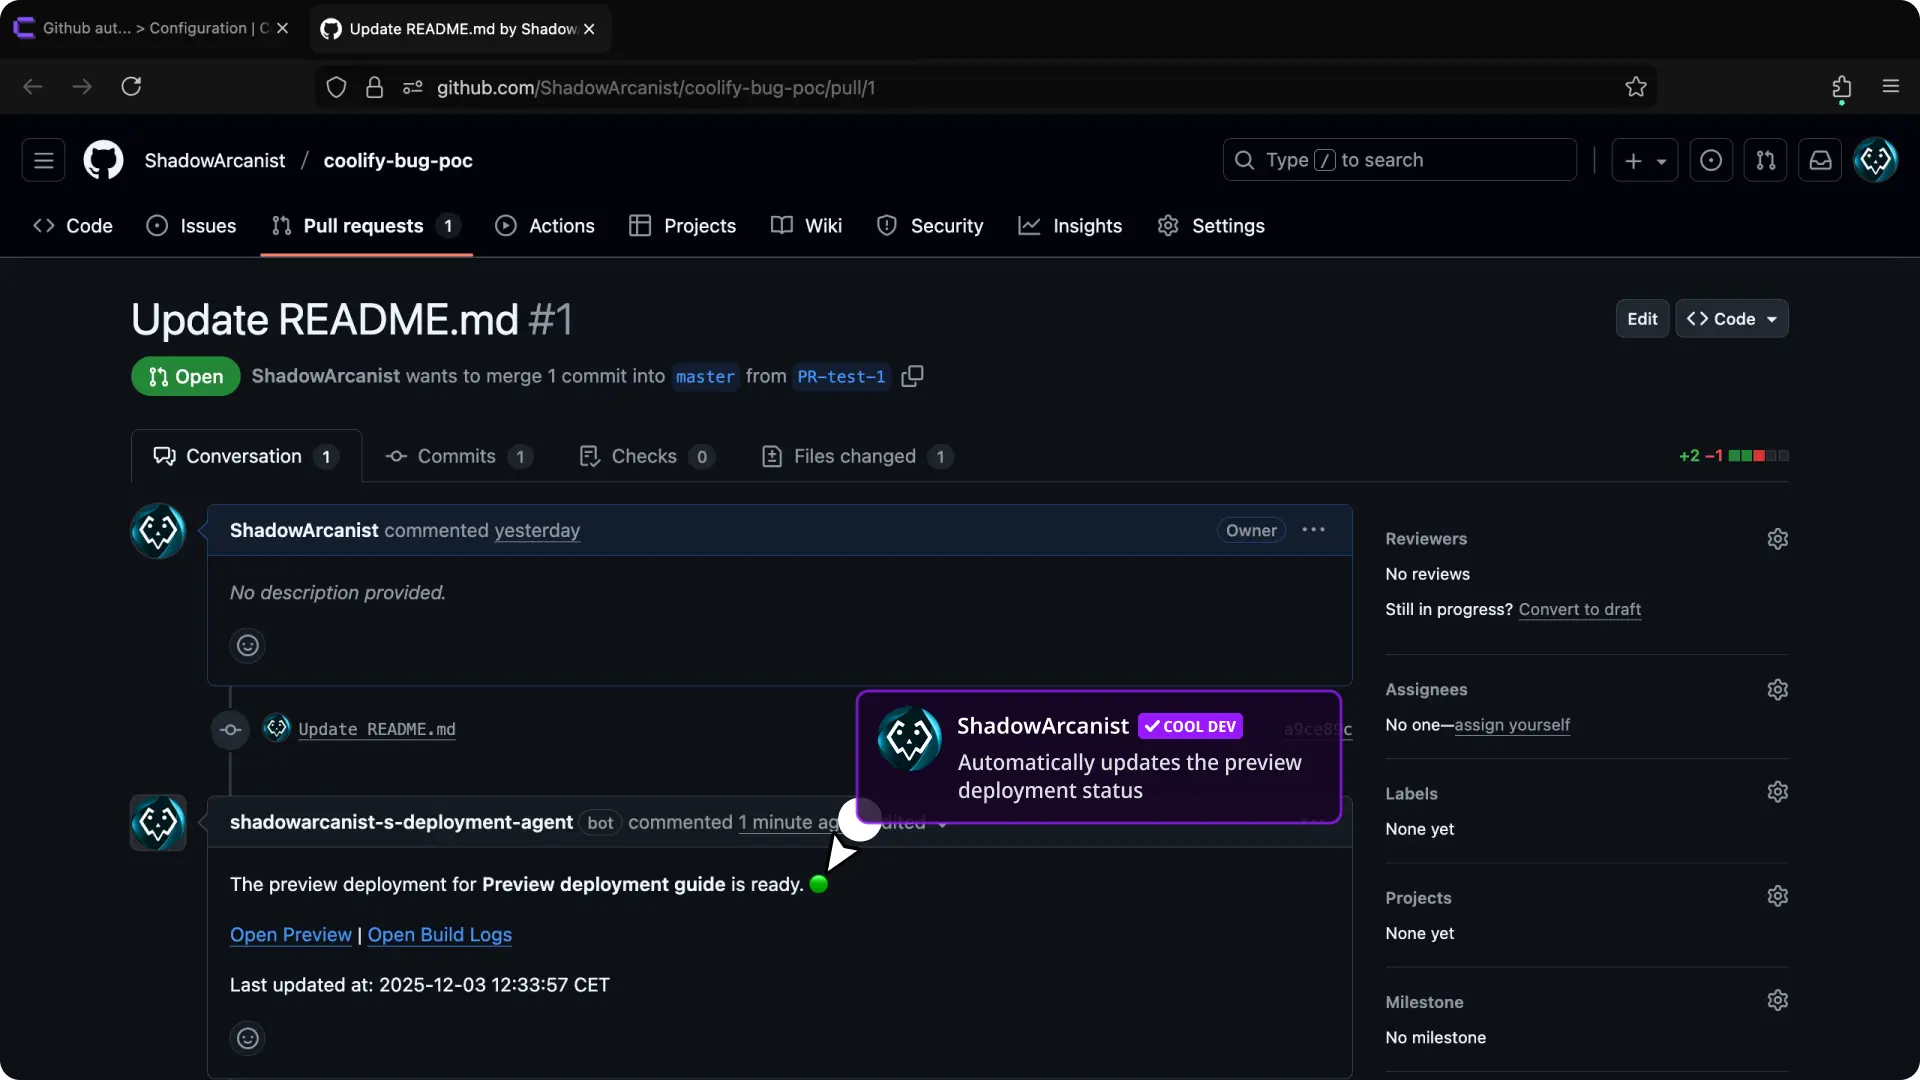
Automated Comments
Coolify posts comments on pull requests with the deployment status and automatically updates them if the status changes.
IMPORTANT
Automated comments only work if you are using the GitHub App for preview deployments.
Setup Methods
There are two methods to set up preview deployments on Coolify:
Setup Using GitHub App
We have a dedicated guide for setting up the GitHub App, so please follow it first: /applications/ci-cd/github/setup-app.
As part of the setup, ensure Preview Deployments is configured correctly. The steps differ depending on whether you use Automated or Manual setup, as shown below.
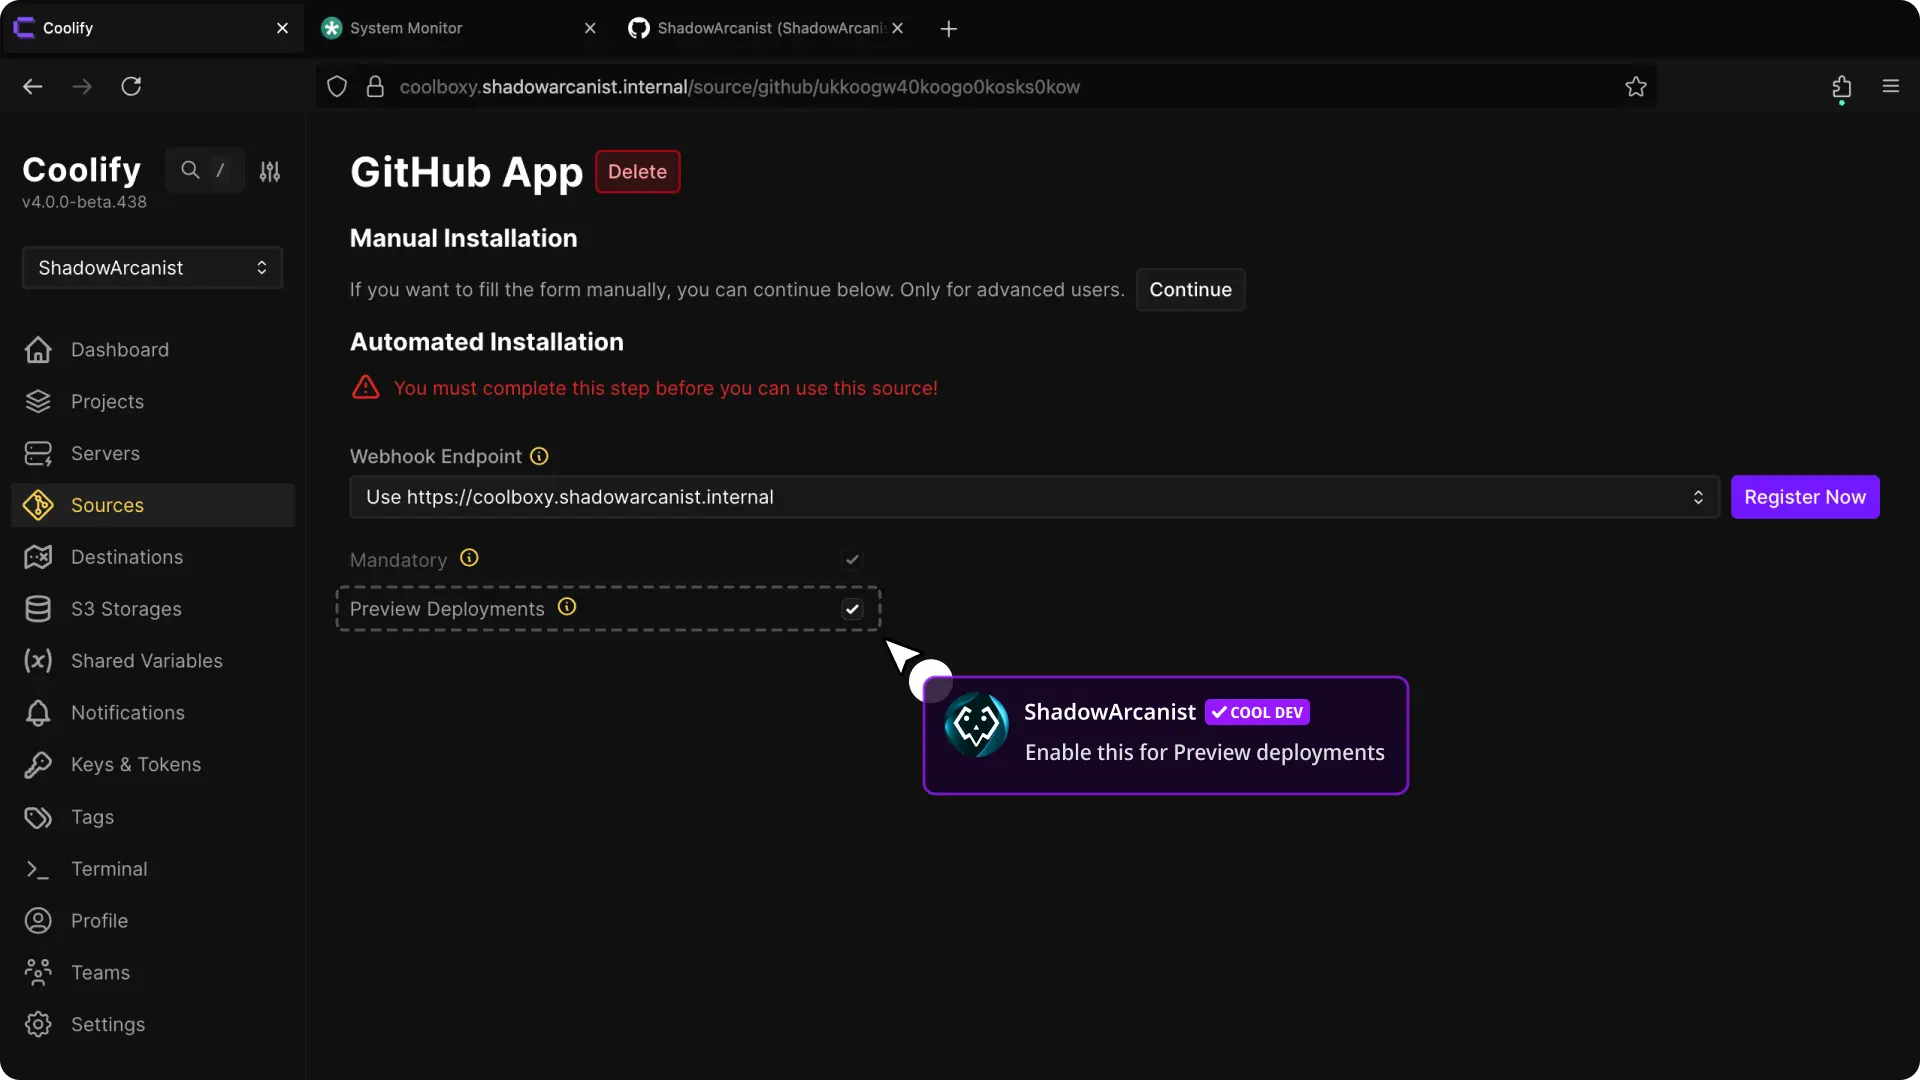
Before you click "Register now", enable the "Preview Deployments" option. That's it!
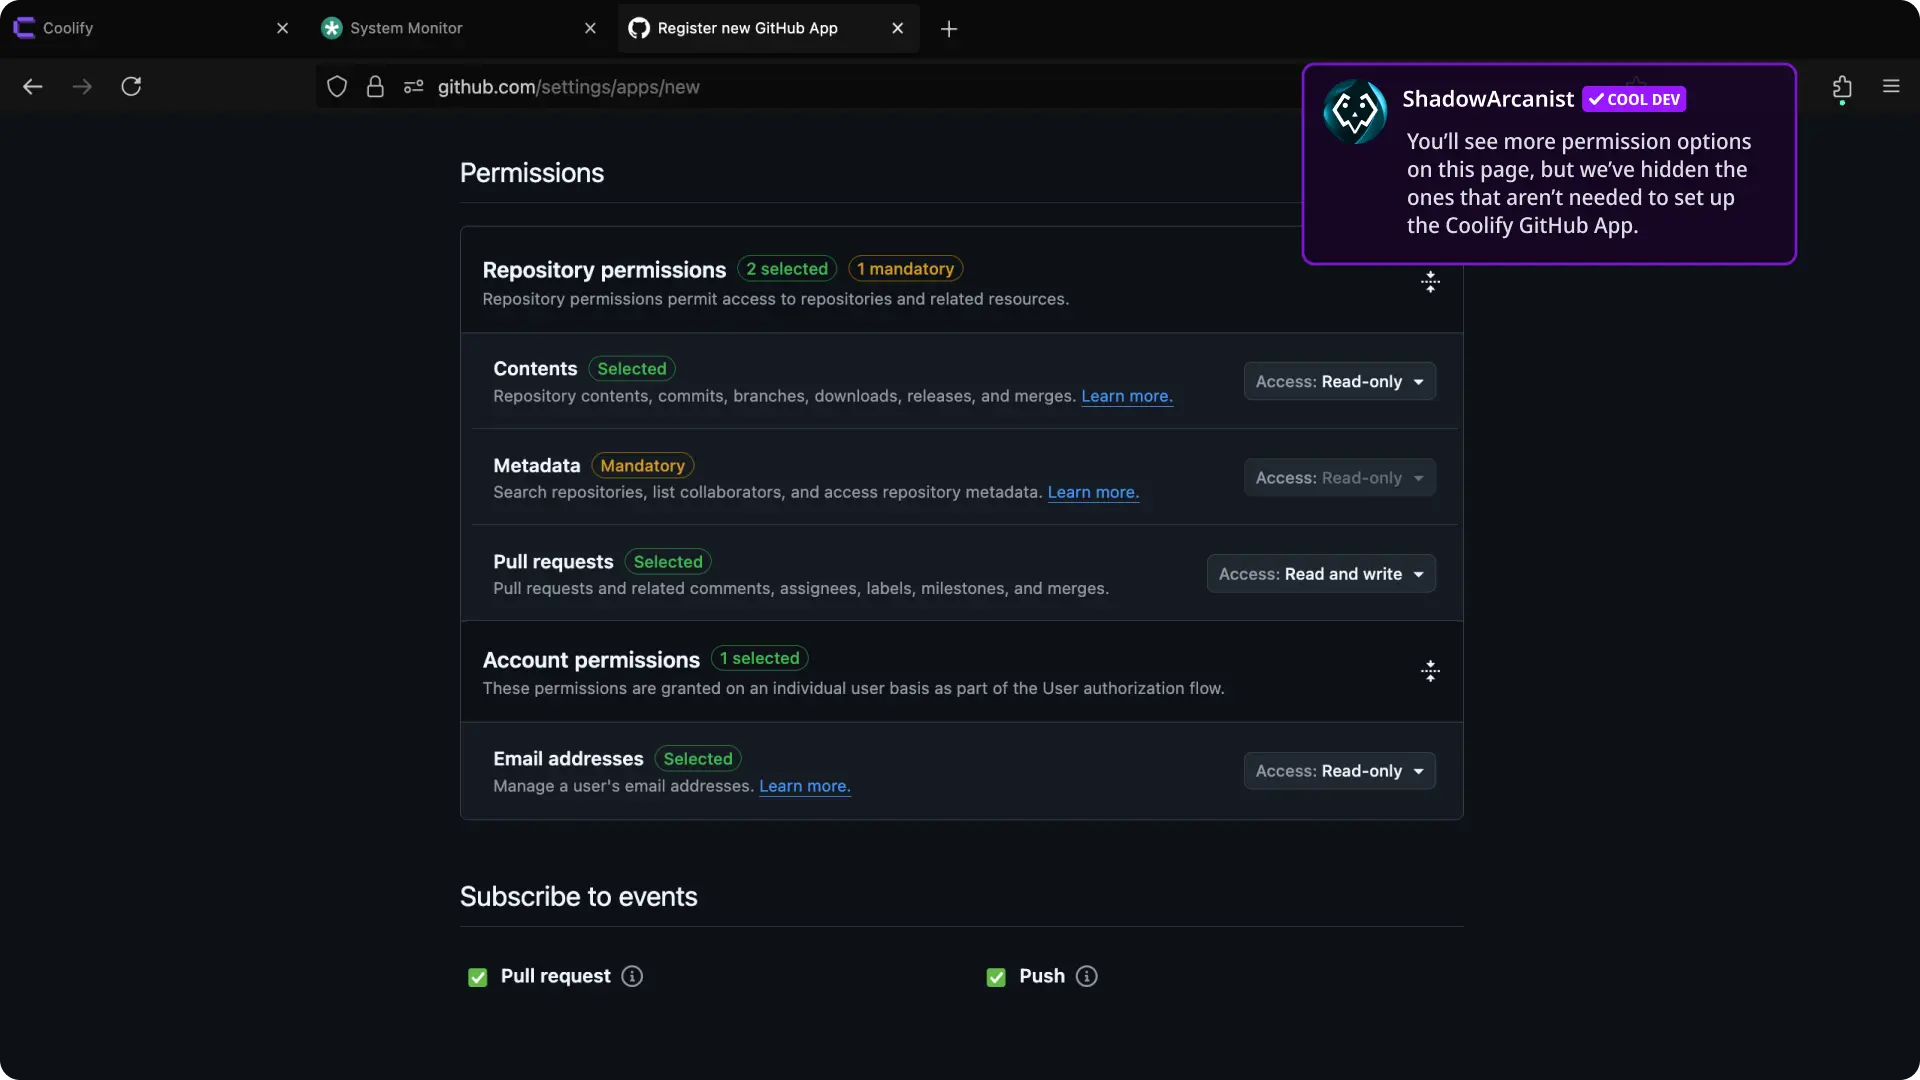
While setting up permissions for the GitHub App, do the following:
- Under the "Permissions" section, click on "Repository permissions".
- Set access to
Read and writeforPull Requests. - Scroll down to the "Subscribe to events" section.
- Enable the
Pull requestsoption.
That's it!
If you have already set up the GitHub App without enabling the "Preview Deployments" feature, follow these steps:
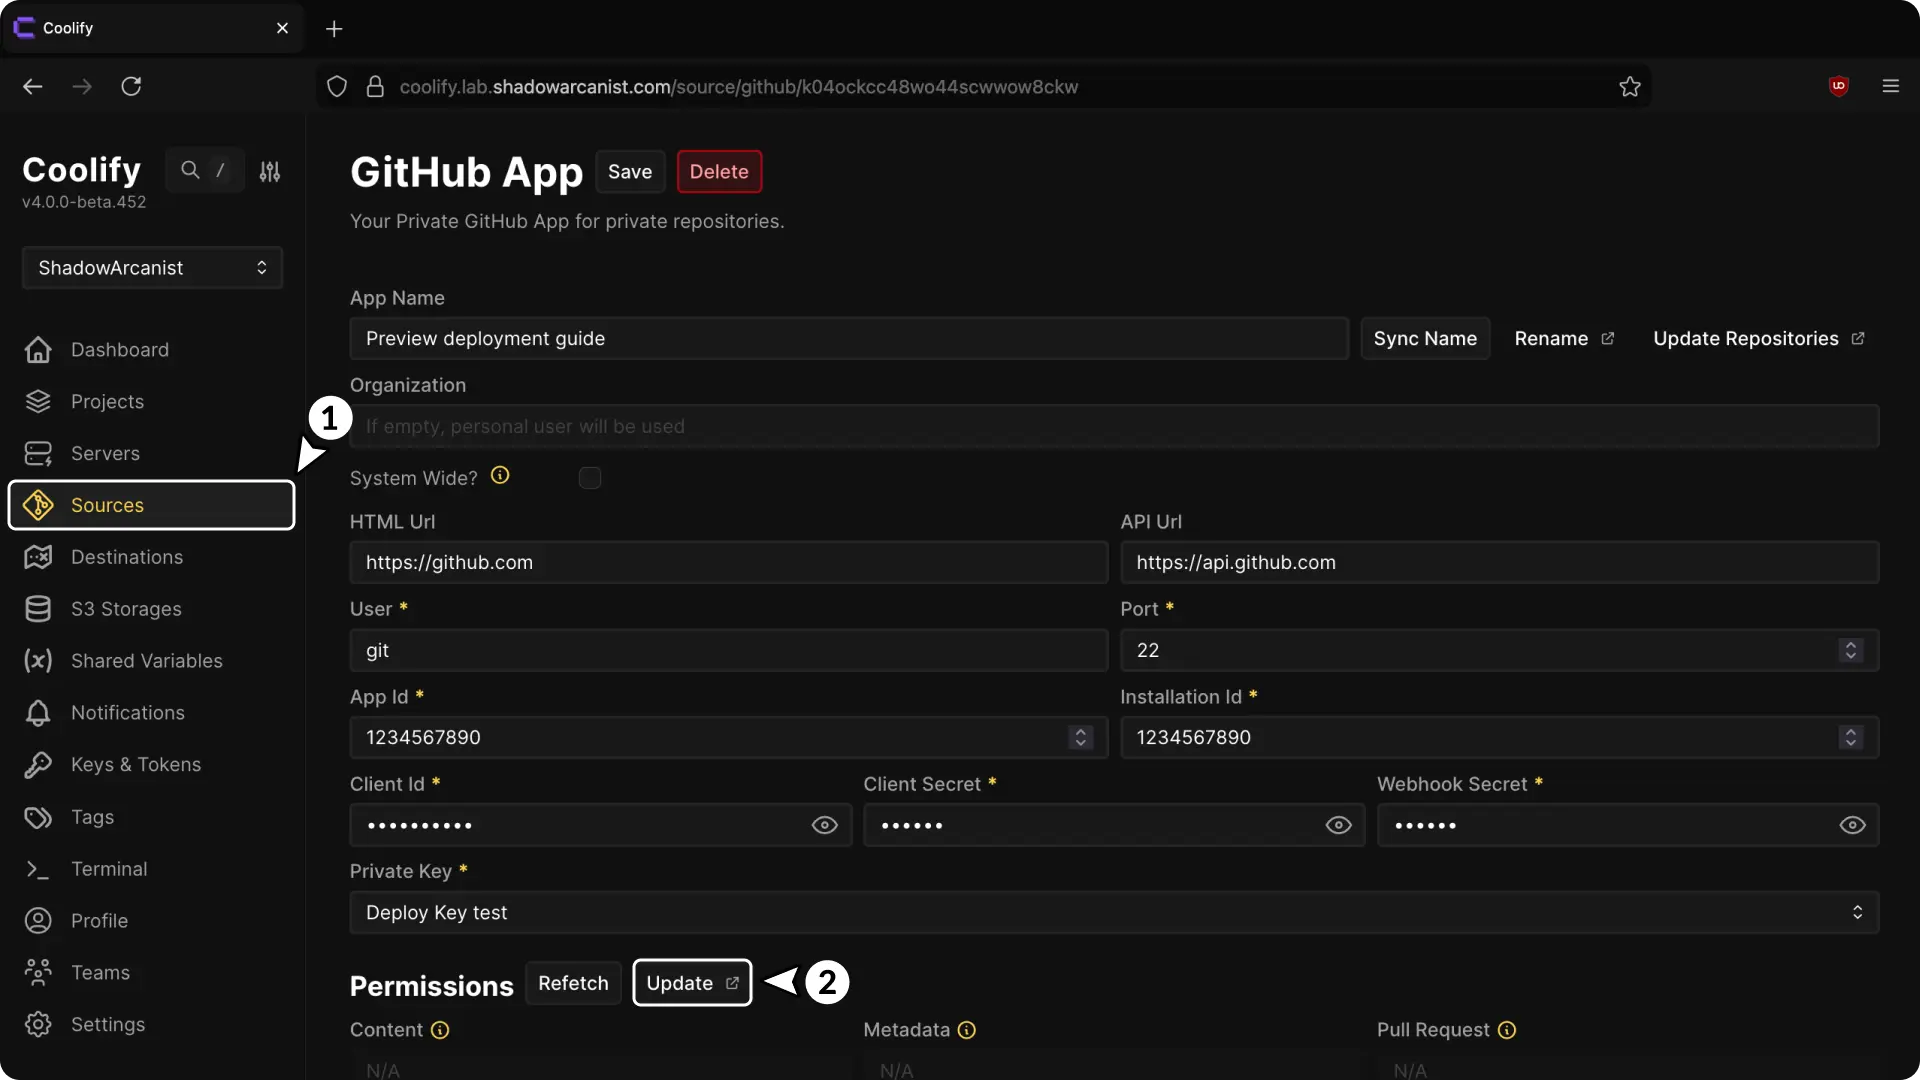
- In your Coolify dashboard, click on Sources from the sidebar, then select your GitHub App.
- Click the Update button in the "Permissions" section (this will redirect you to GitHub).
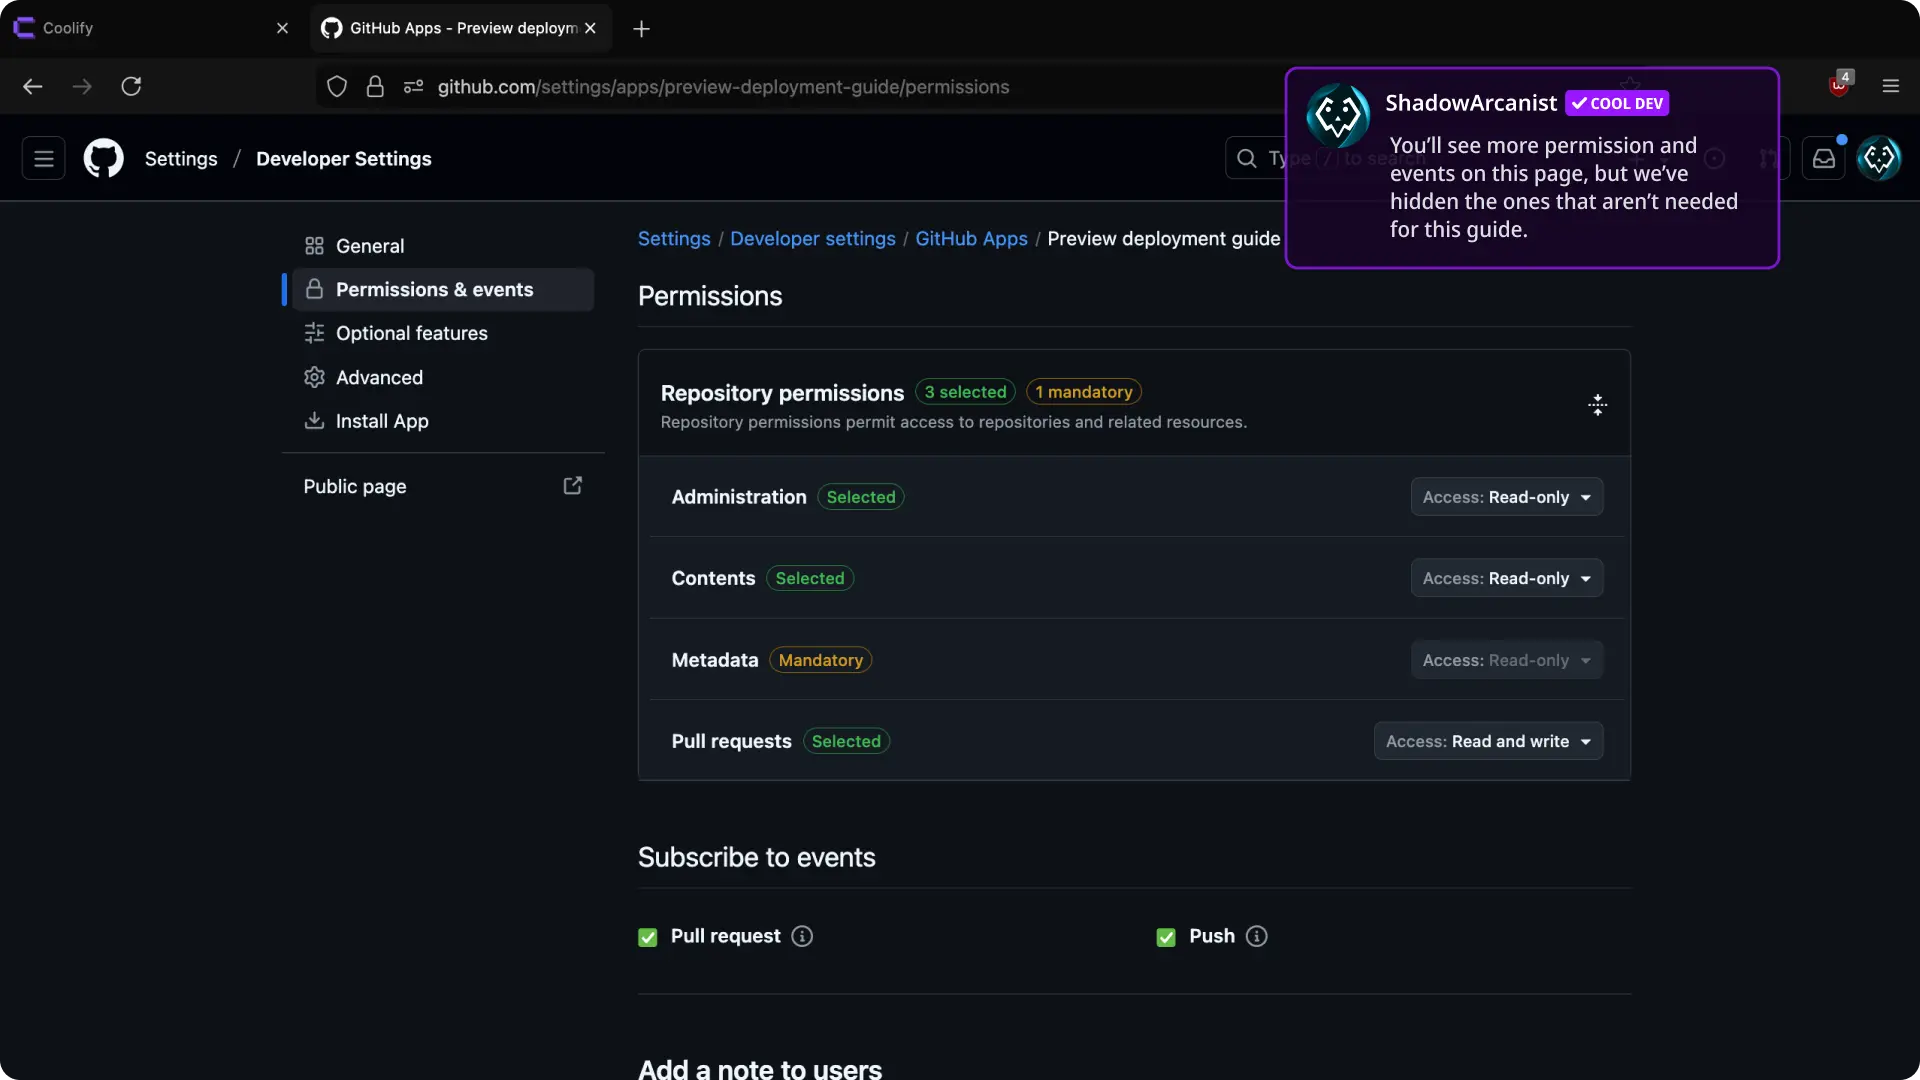
- Under the "Permissions" section, click on "Repository permissions".
- Set access to
Read and writeforPull Requests. - Scroll down to the "Subscribe to events" section.
- Enable the
Pull requestsoption.
Setup Using Webhooks
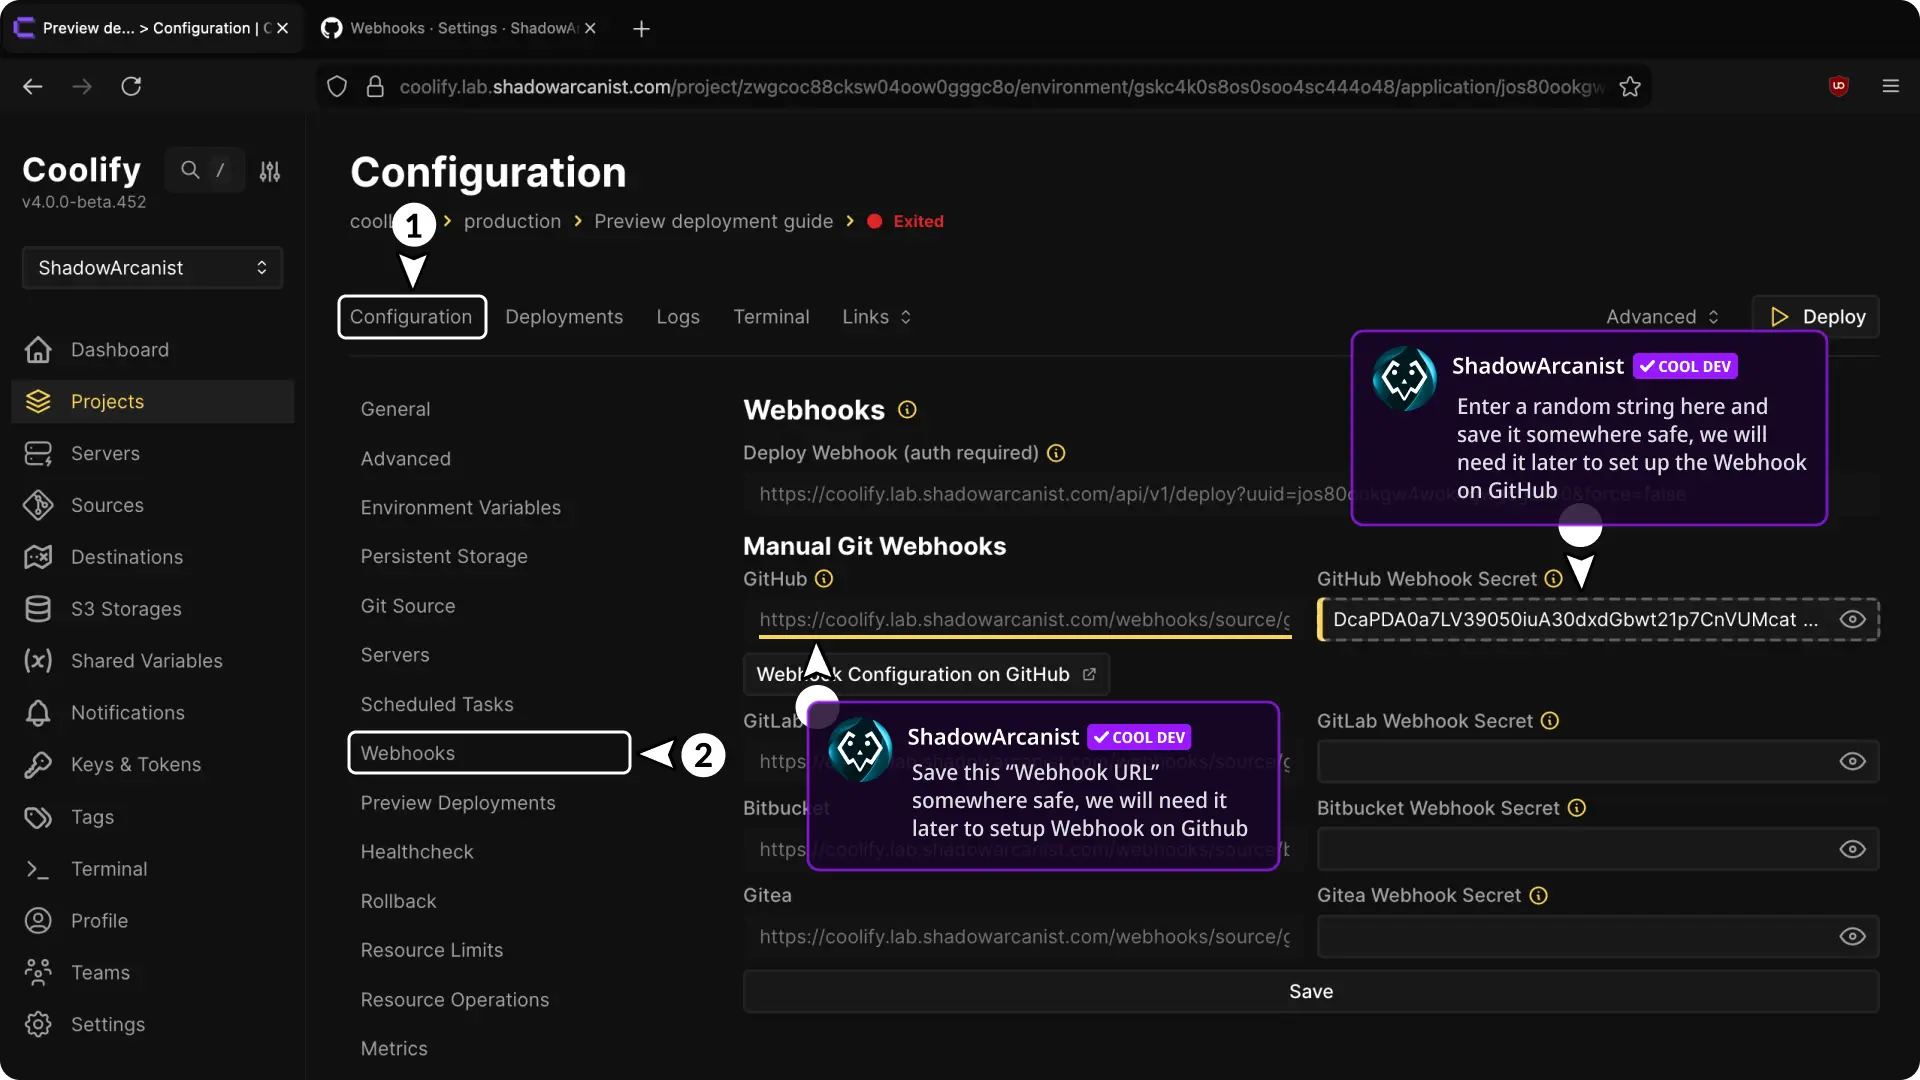
- Enter a GitHub webhook secret (this must be a random string; you can use tools like Random String Generator).
- Save the webhook URL somewhere safe—we'll need it later.
IMPORTANT
A webhook secret acts like a password. Coolify only accepts the webhook if the secret matches.
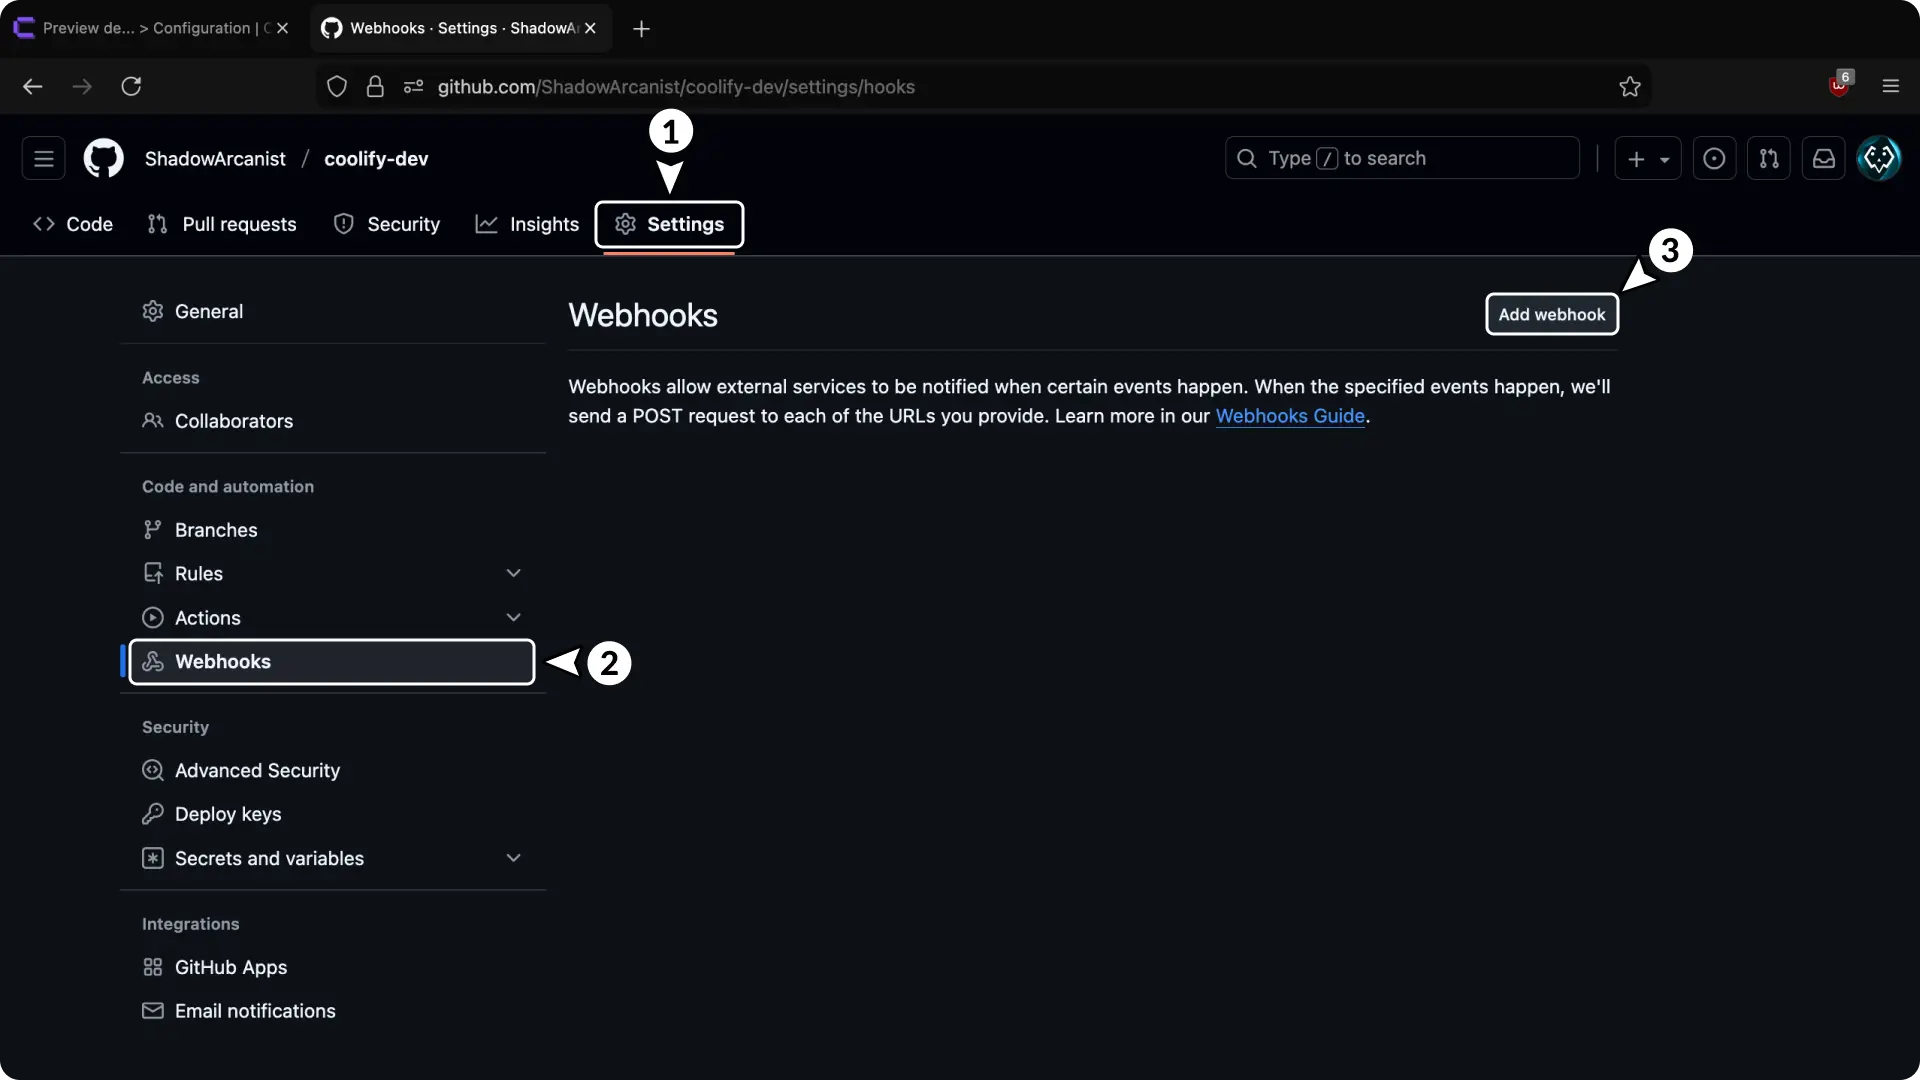
- Go to your repository settings page.
- Click on Webhooks from the sidebar.
- Click the Add webhook button.
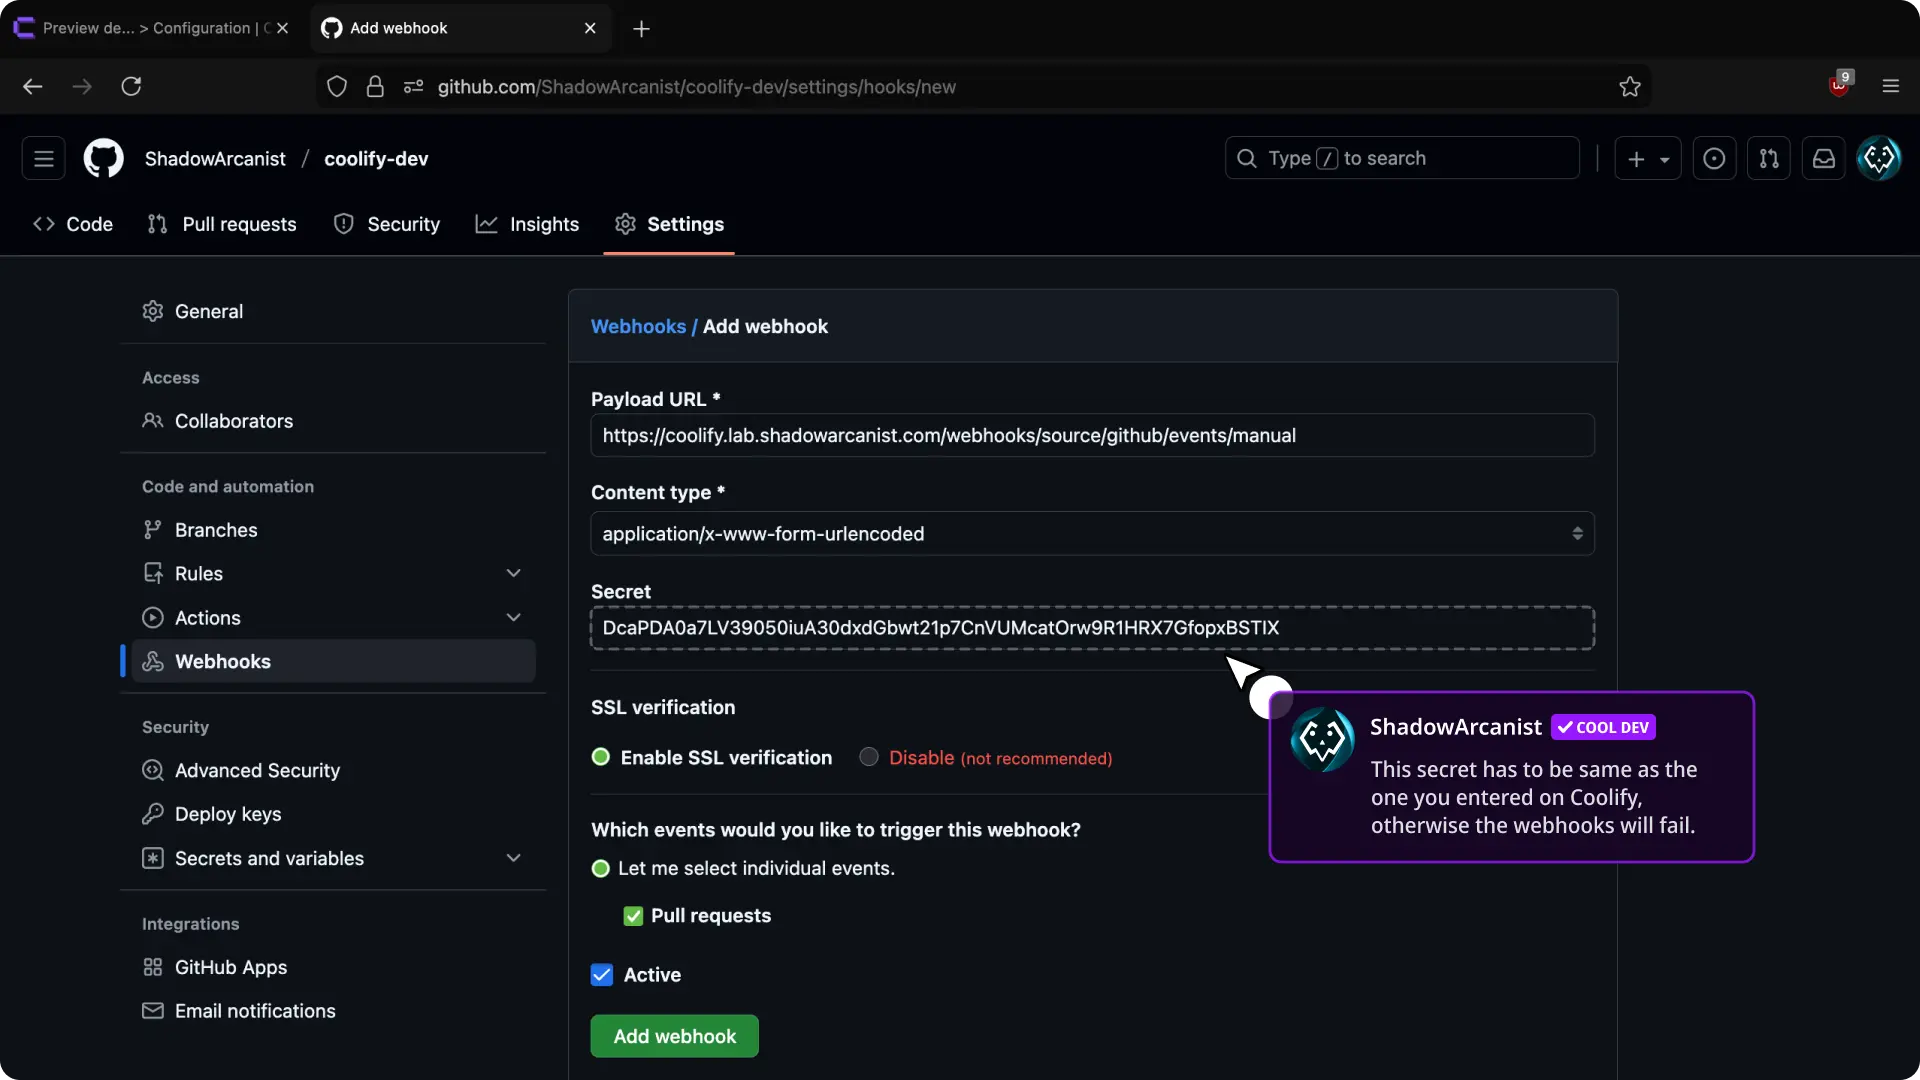
- Enter the previously copied webhook URL from Coolify in the "Payload URL" field.
- Enter the webhook secret from Coolify in the "Secret" field.
- Enable "Enable SSL verification".
- Select "Let me select individual events".
- Select "Pull Requests".
- Enable "Active".
- Click the Add webhook button.
After clicking "Add webhook", you'll see a page like the one shown below:
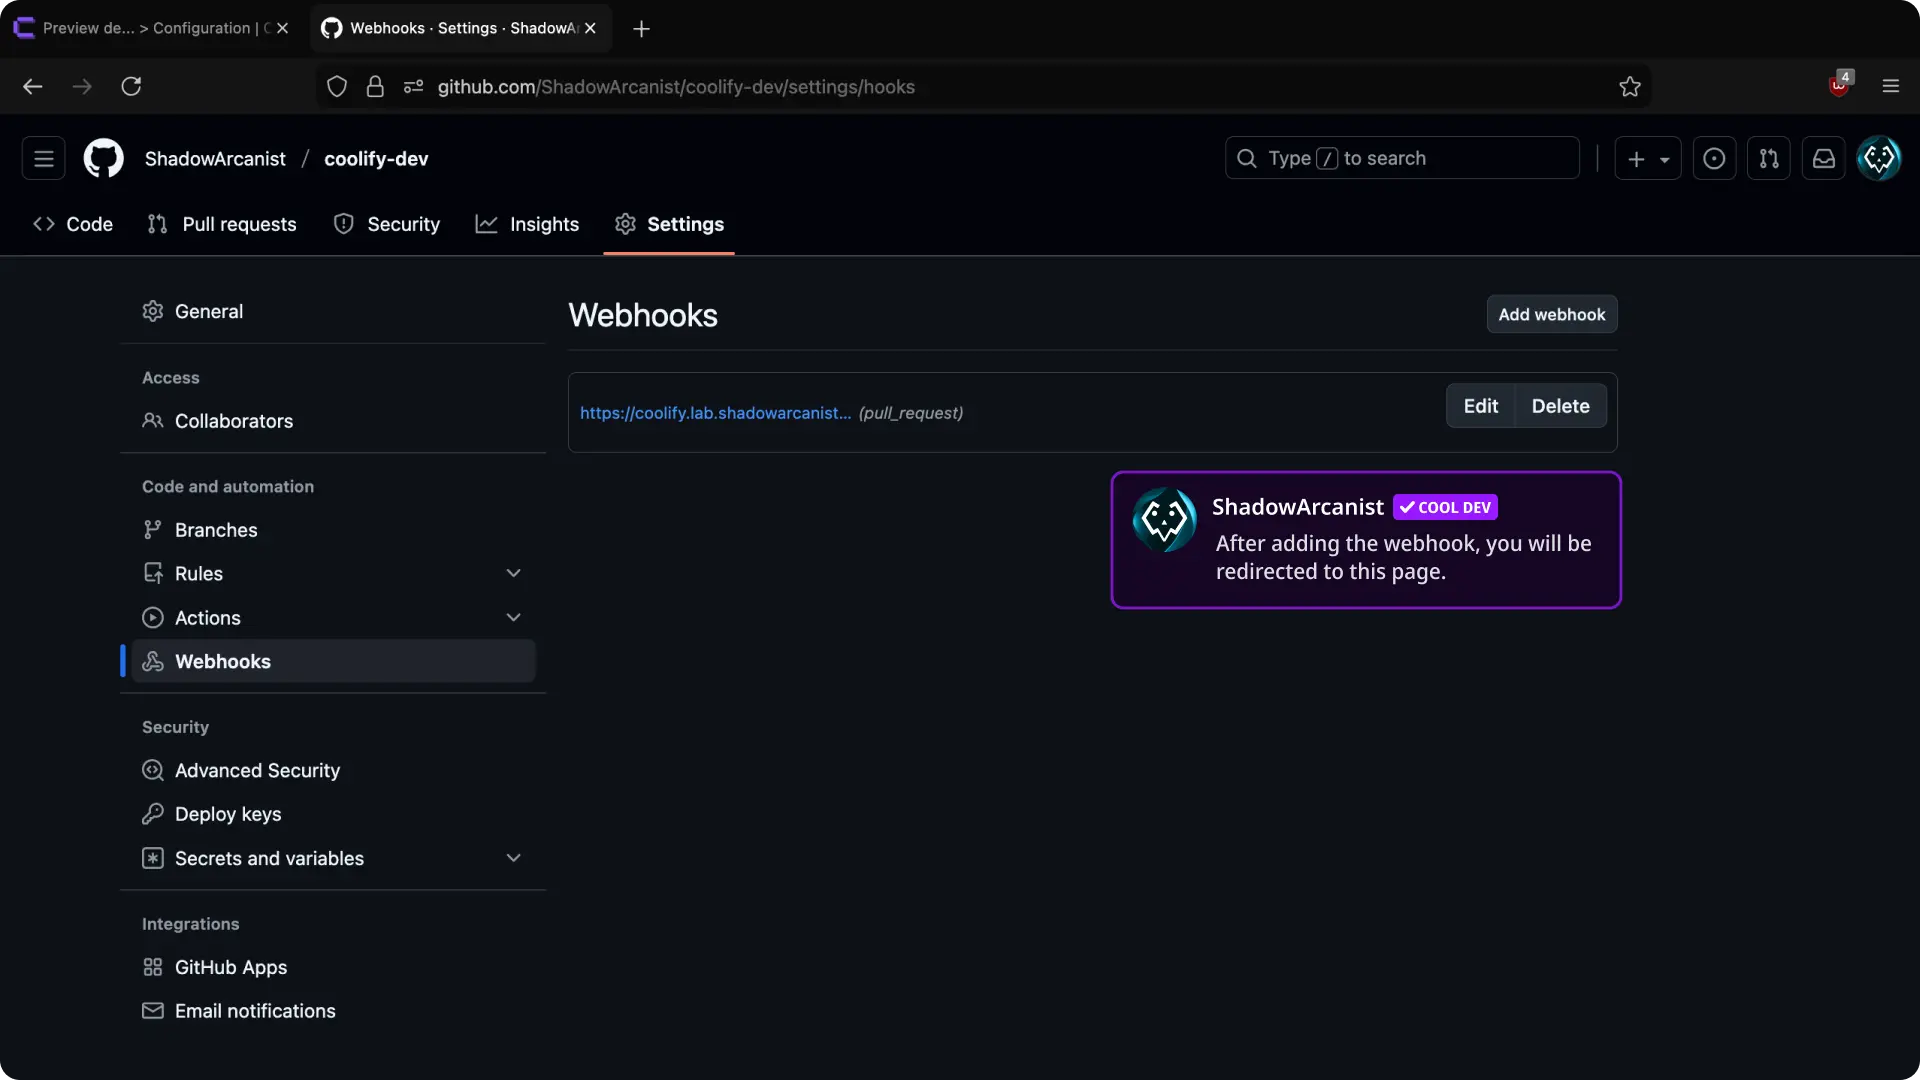
That's it! Coolify will automatically deploy preview deployments when a new pull request is created.