
Preview deployments
A preview deployment runs the code from a pull request or merge request separately from the production application. Each preview can use its own domain and environment variables without replacing the production deployment.
Coolify deletes an automatically created preview after its pull request or merge request is closed or merged.
Before enabling previews
Confirm that the application deploys successfully from its configured branch and that the deployment server has enough capacity to run production and preview containers at the same time.
A pull request can run code on the deployment server. Do not expose production credentials to preview deployments, and keep Allow Public PR Deployments disabled unless you accept the risk of running code from public contributors.
Enable preview deployments
Open the application, select Configuration > Advanced > Deployment, then enable Preview Deployments.
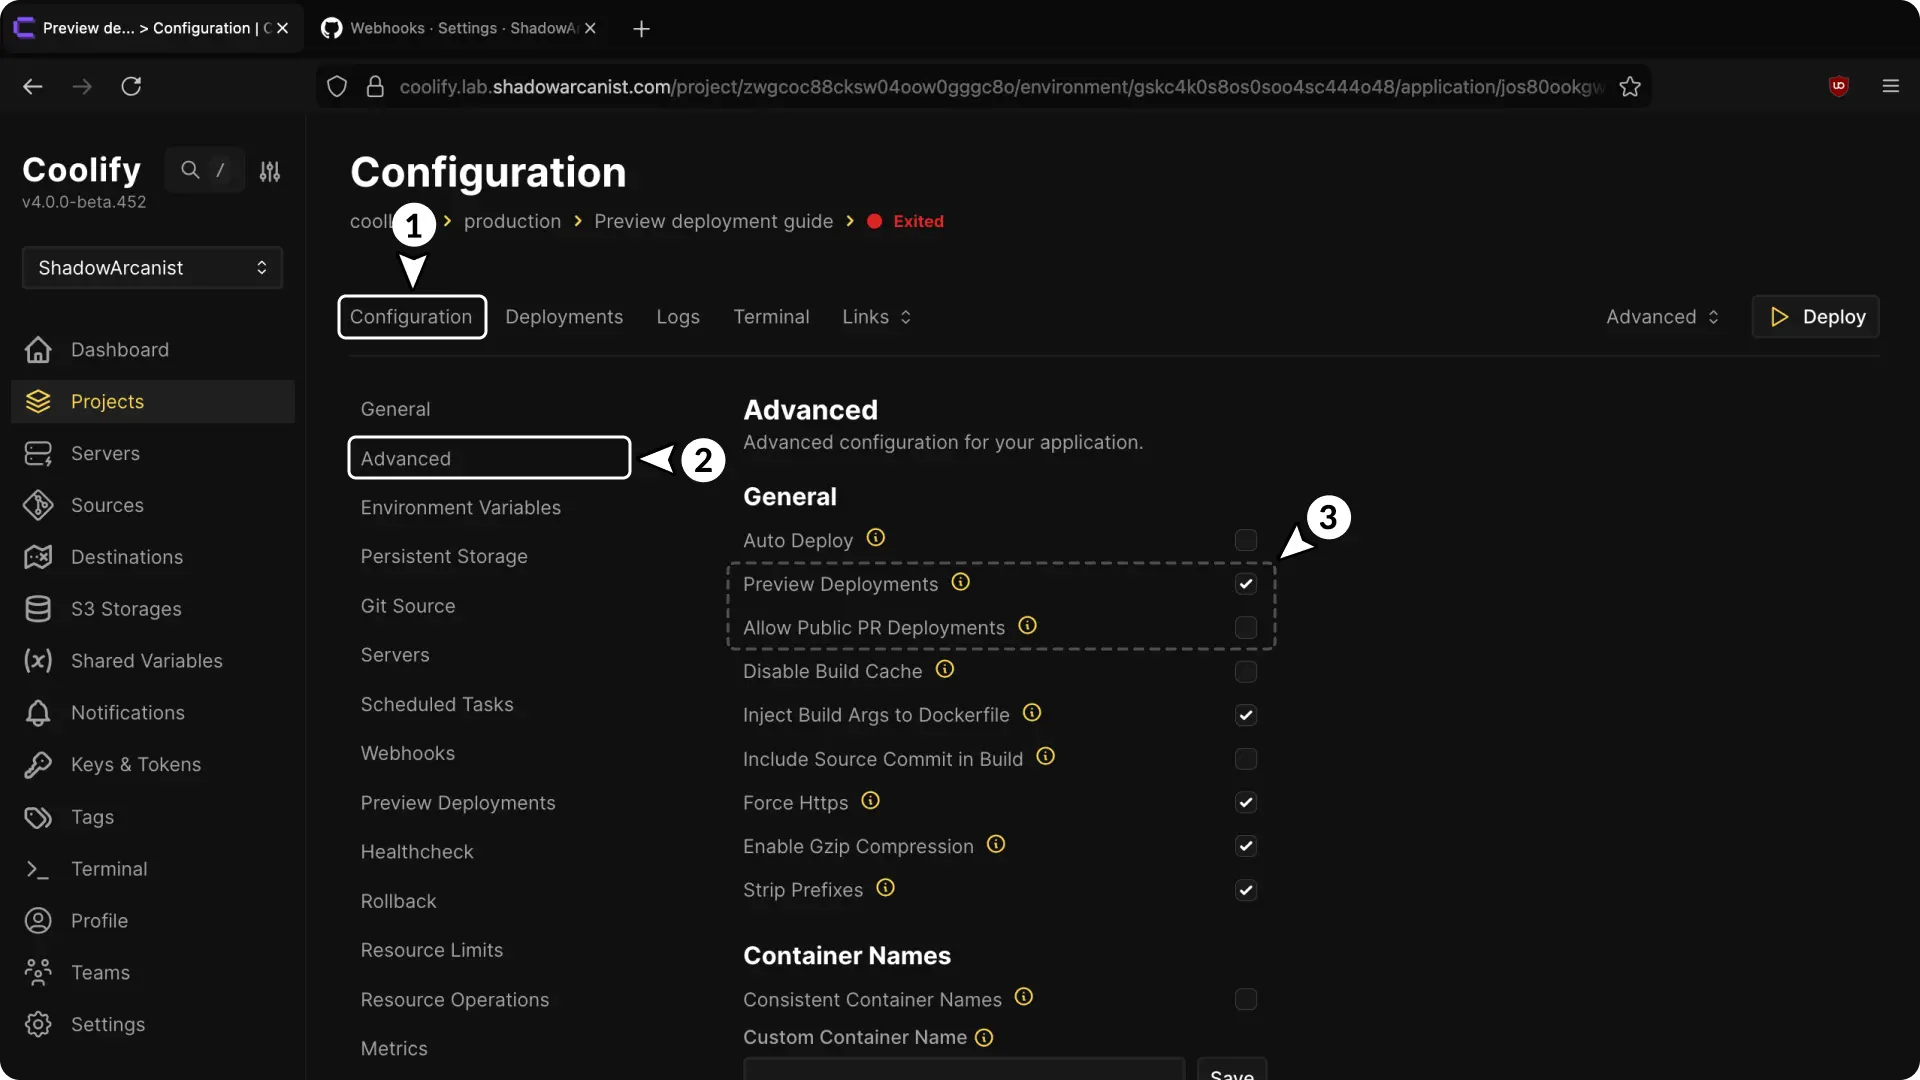
With Allow Public PR Deployments disabled, Coolify blocks pull requests from forks unless the author is a repository owner, member, or collaborator. Enable it only when anyone should be allowed to trigger a preview.
Connect pull-request events
Choose how Coolify receives pull-request or merge-request events for the application.
Follow Set up a GitHub App first. Its repository installation must include the repository used by the application.
Enable preview permissions in Coolify
During the automated GitHub App setup, enable Preview Deployments before selecting Register Now.
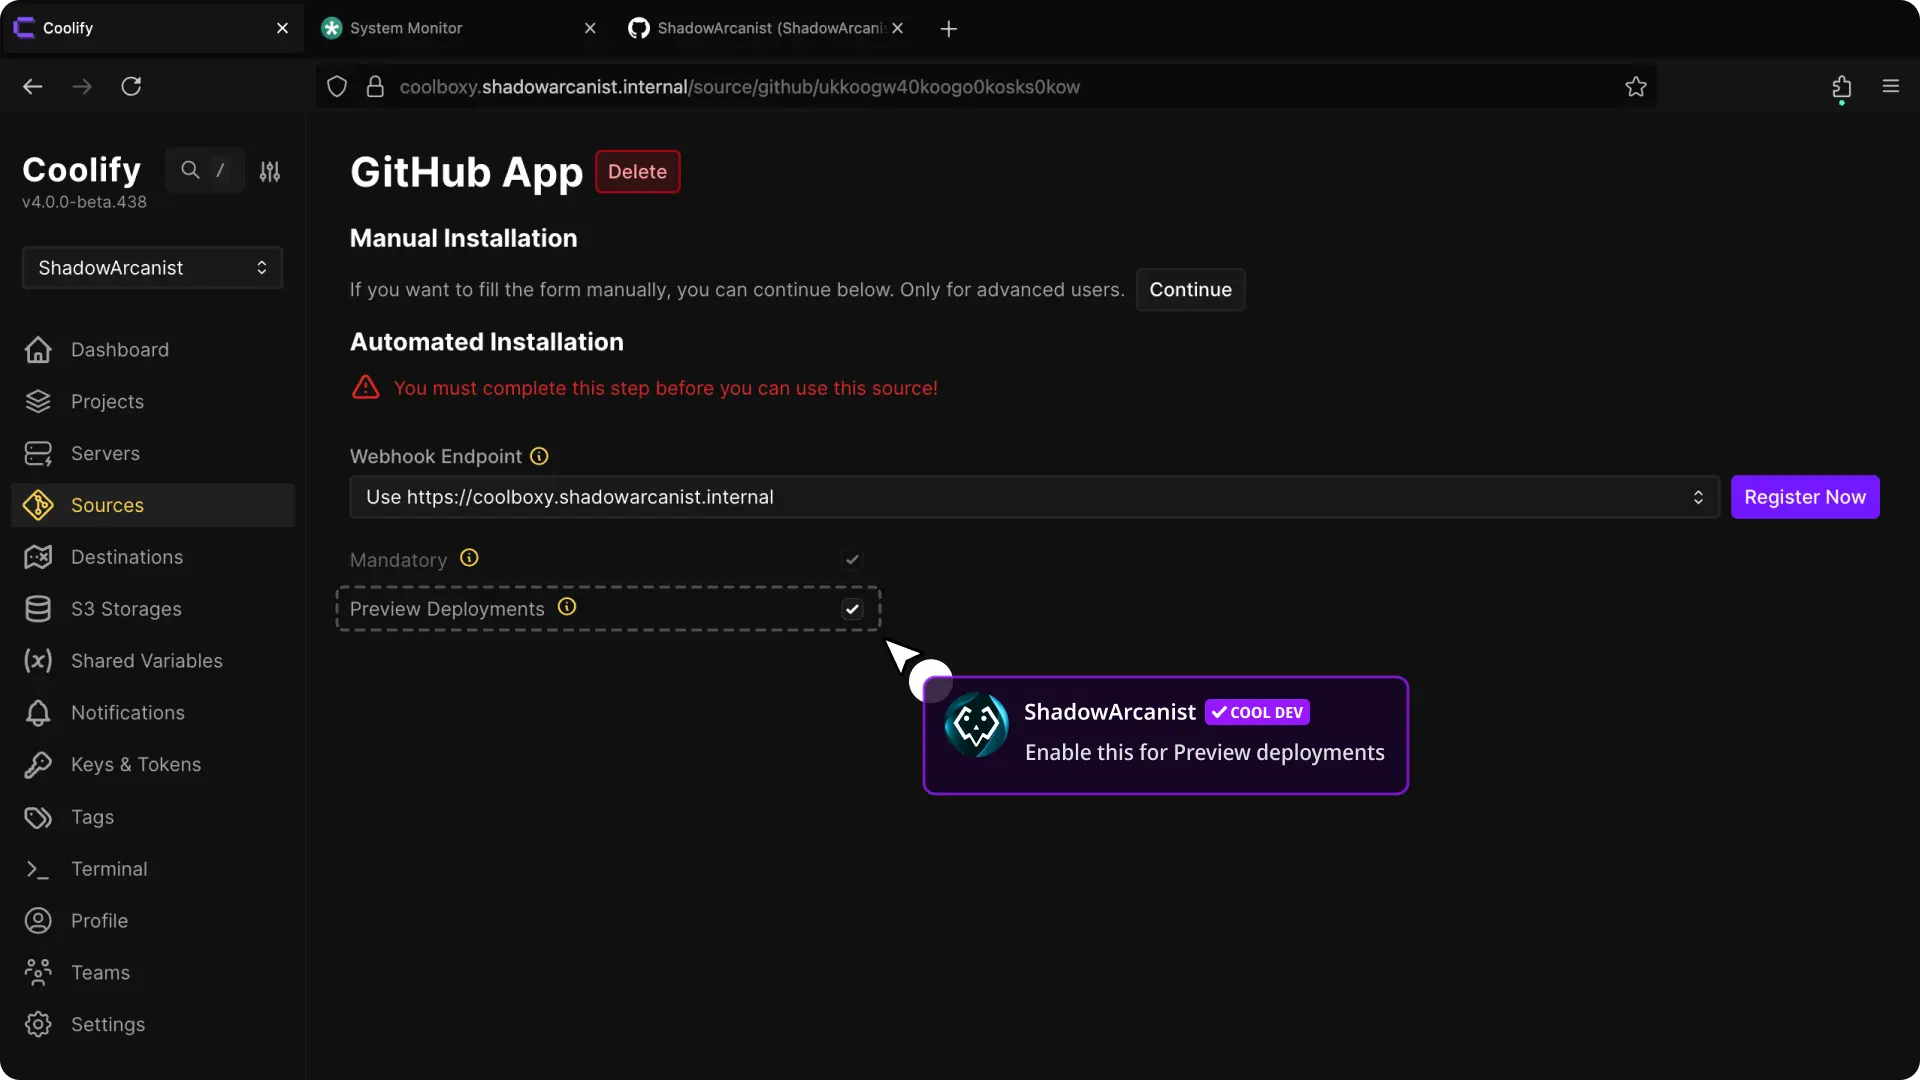
Coolify requests read-and-write access to pull requests and subscribes the app to pull-request events.
Finish the GitHub App installation
Complete the registration and install the GitHub App for the required account and repositories.
Verify the event connection
Open or update a pull request. Open Configuration > Preview Deployments in Coolify and confirm that the pull request appears.
Update an existing GitHub App
If the GitHub App was created without preview permissions, update it before testing previews.
Open the GitHub App permissions
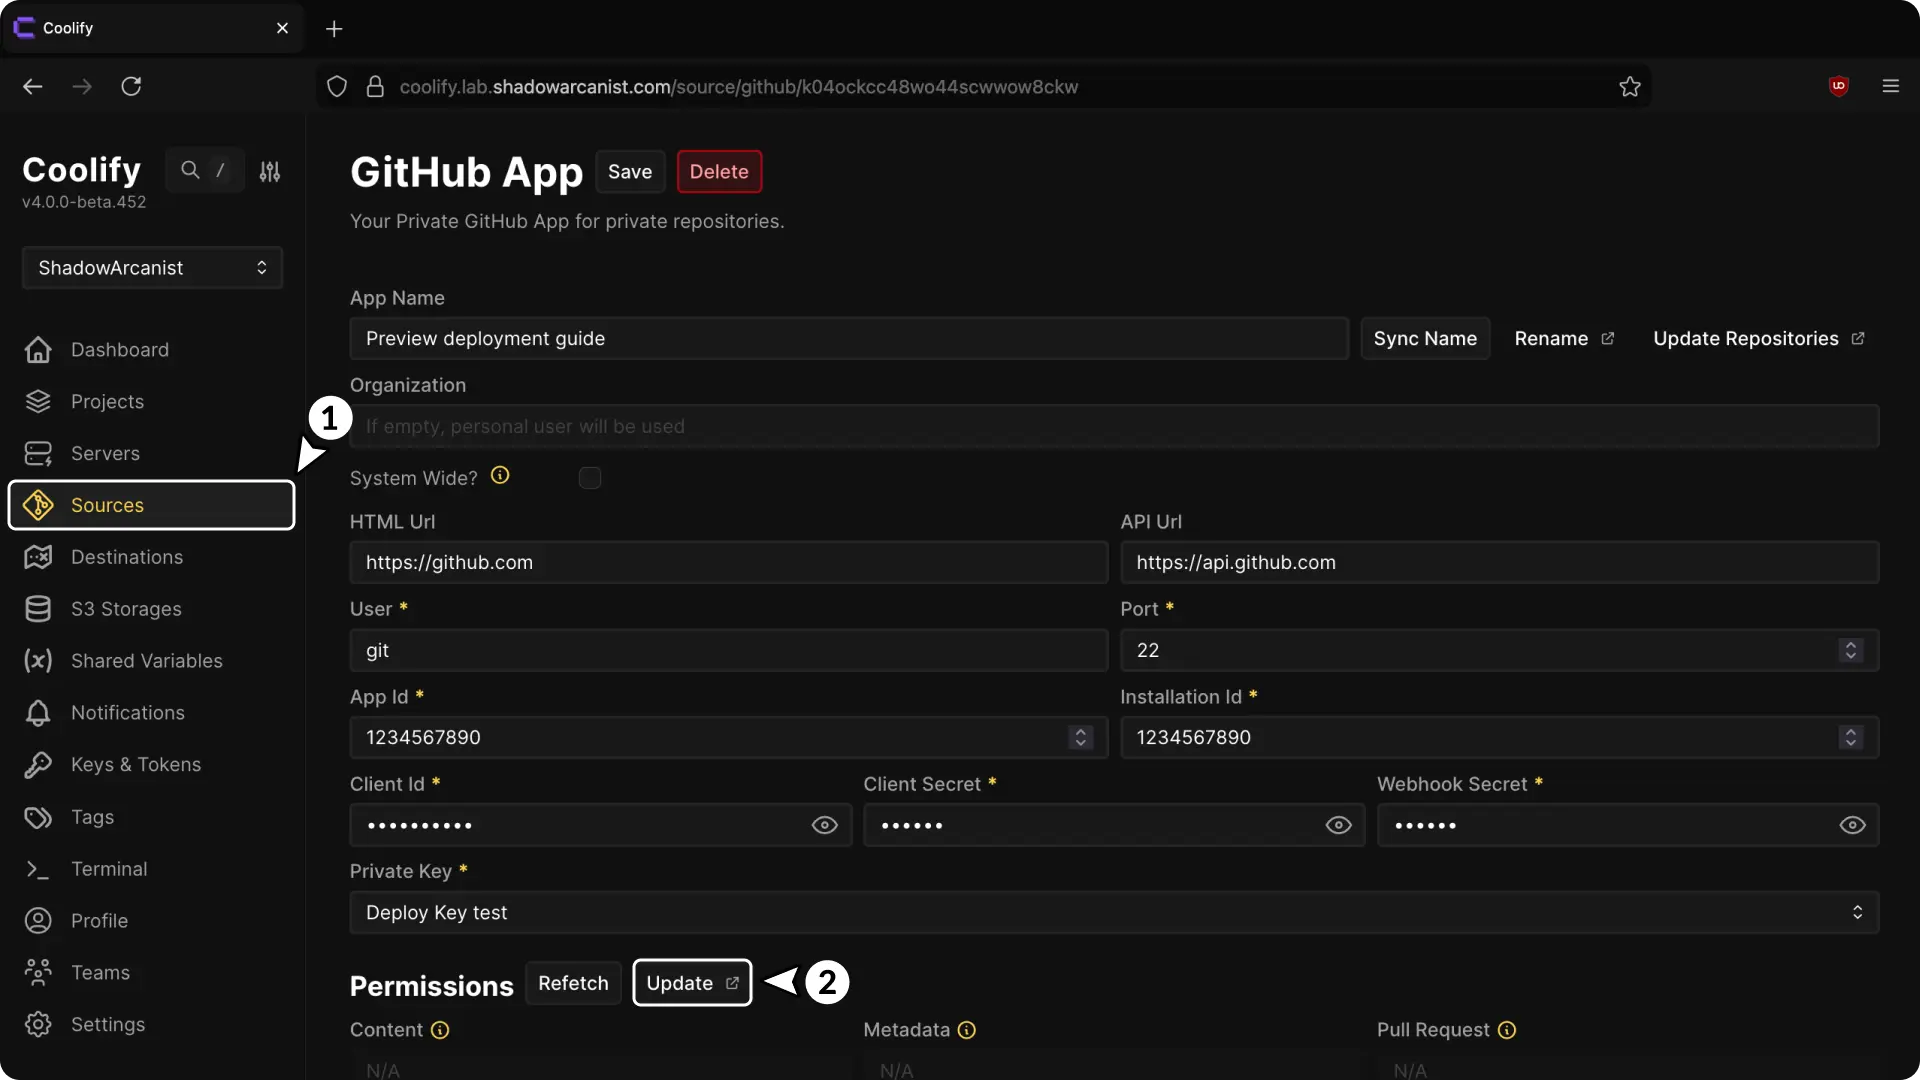
Open Sources in Coolify, select the GitHub App, open Permissions, then select Update.
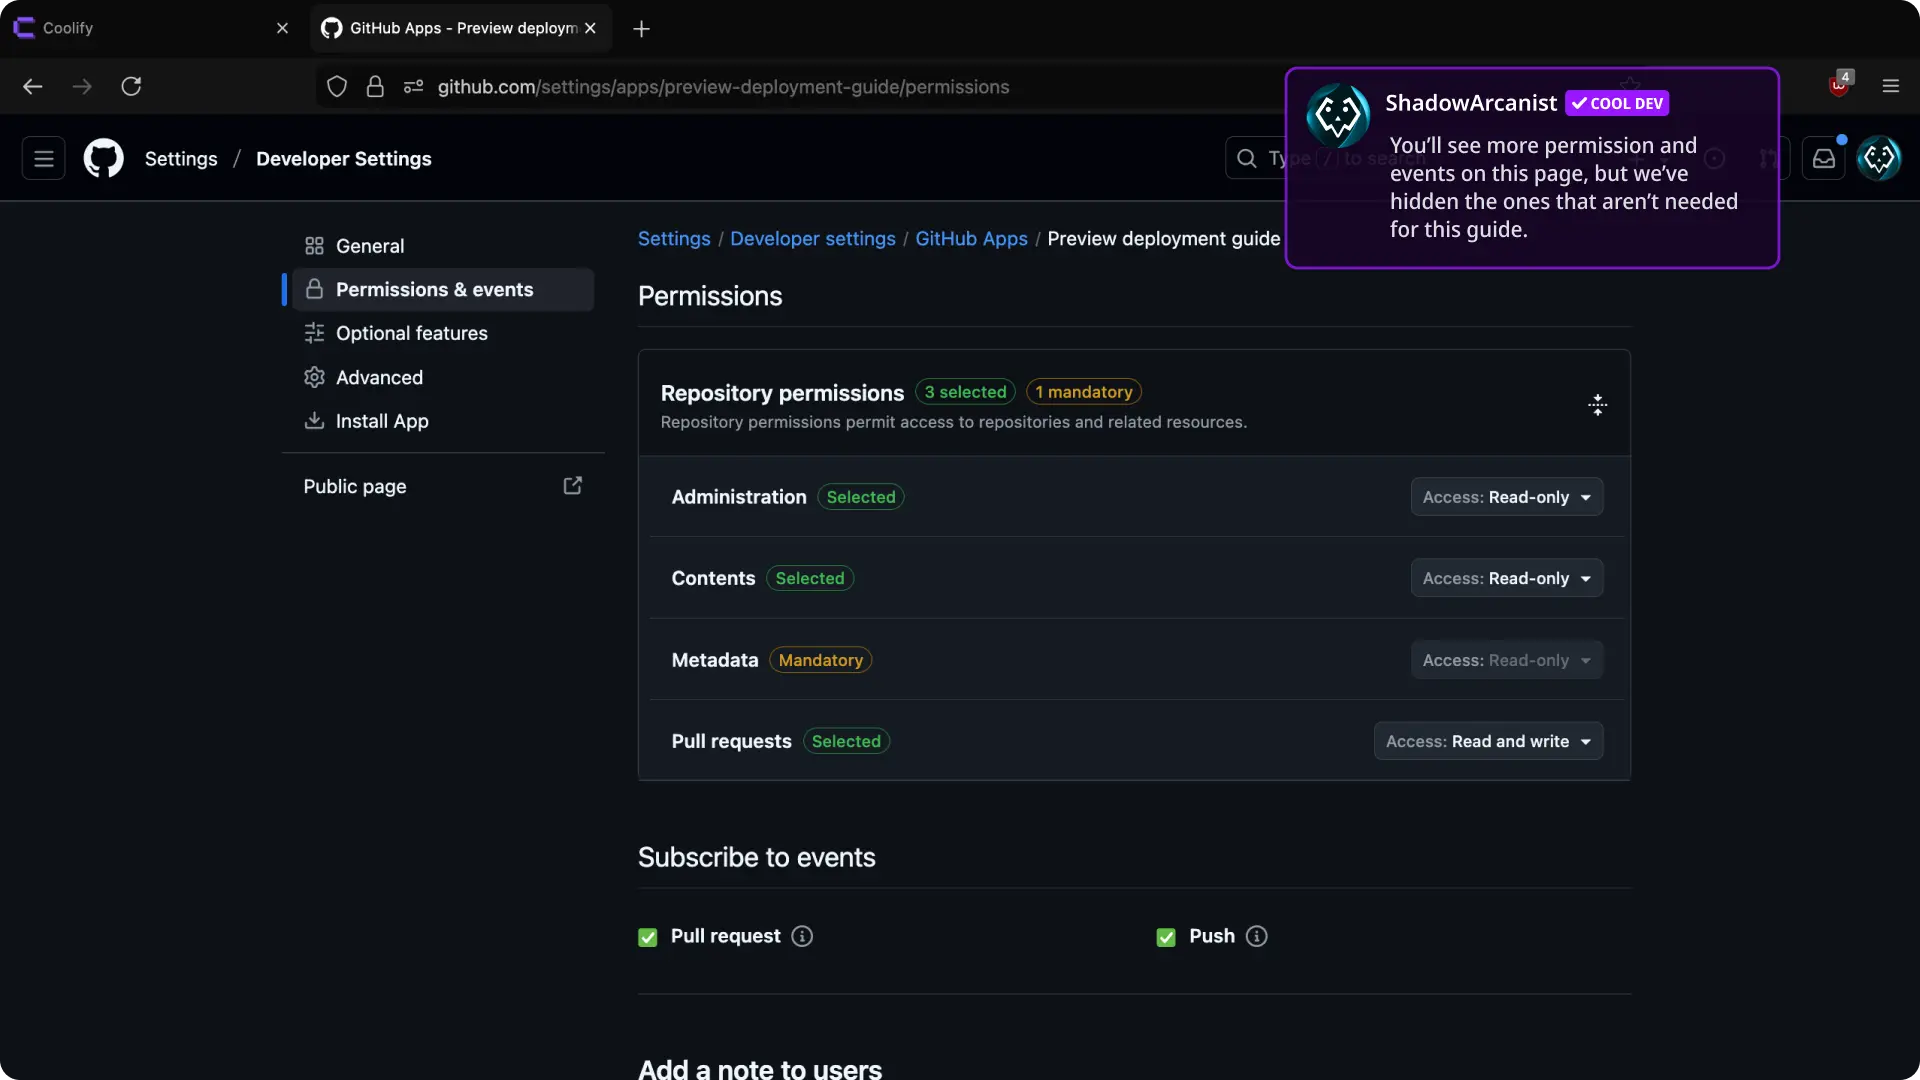
Update GitHub permissions
On GitHub, set Pull requests to Read and write under Repository permissions and subscribe to the Pull request event.
Accept and verify the update
Accept the permission update, then open or update a pull request. Confirm that it appears under Configuration > Preview Deployments.
Configure preview domains
Open Configuration > Preview Deployments. Preview URL Template controls the generated domain:
{{pr_id}}inserts the pull-request or merge-request number.{{random}}inserts a random value.{{domain}}inserts the production application's domain name.
The default template is {{pr_id}}.{{domain}}.
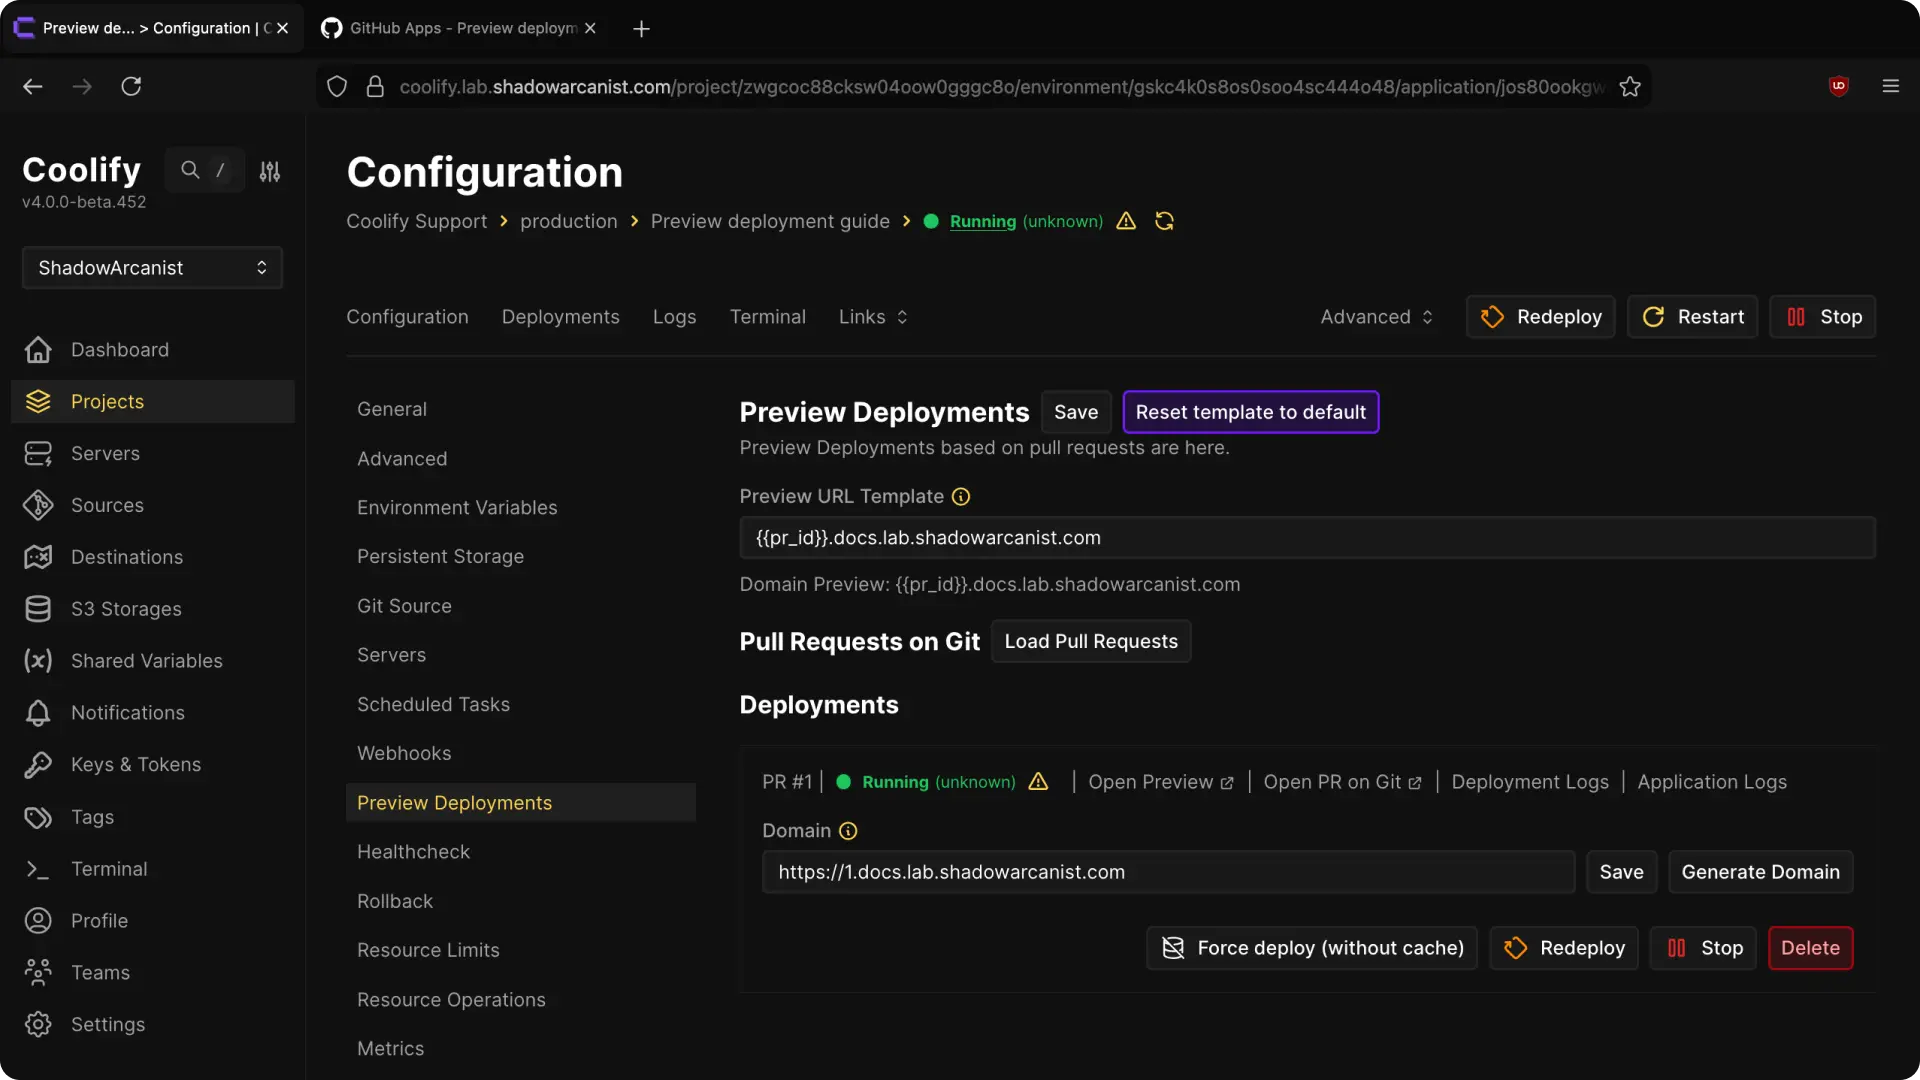
For example, {{pr_id}}.preview.example.com produces 123.preview.example.com for pull request 123.
To use domains such as 123.preview.example.com, create an A or AAAA record for *.preview.example.com that points to the deployment server.
You can also enter a domain for an individual preview. Docker Compose previews can have a separate domain for each service.
Separate preview variables from production
Coolify keeps production and preview environment variables in separate groups.
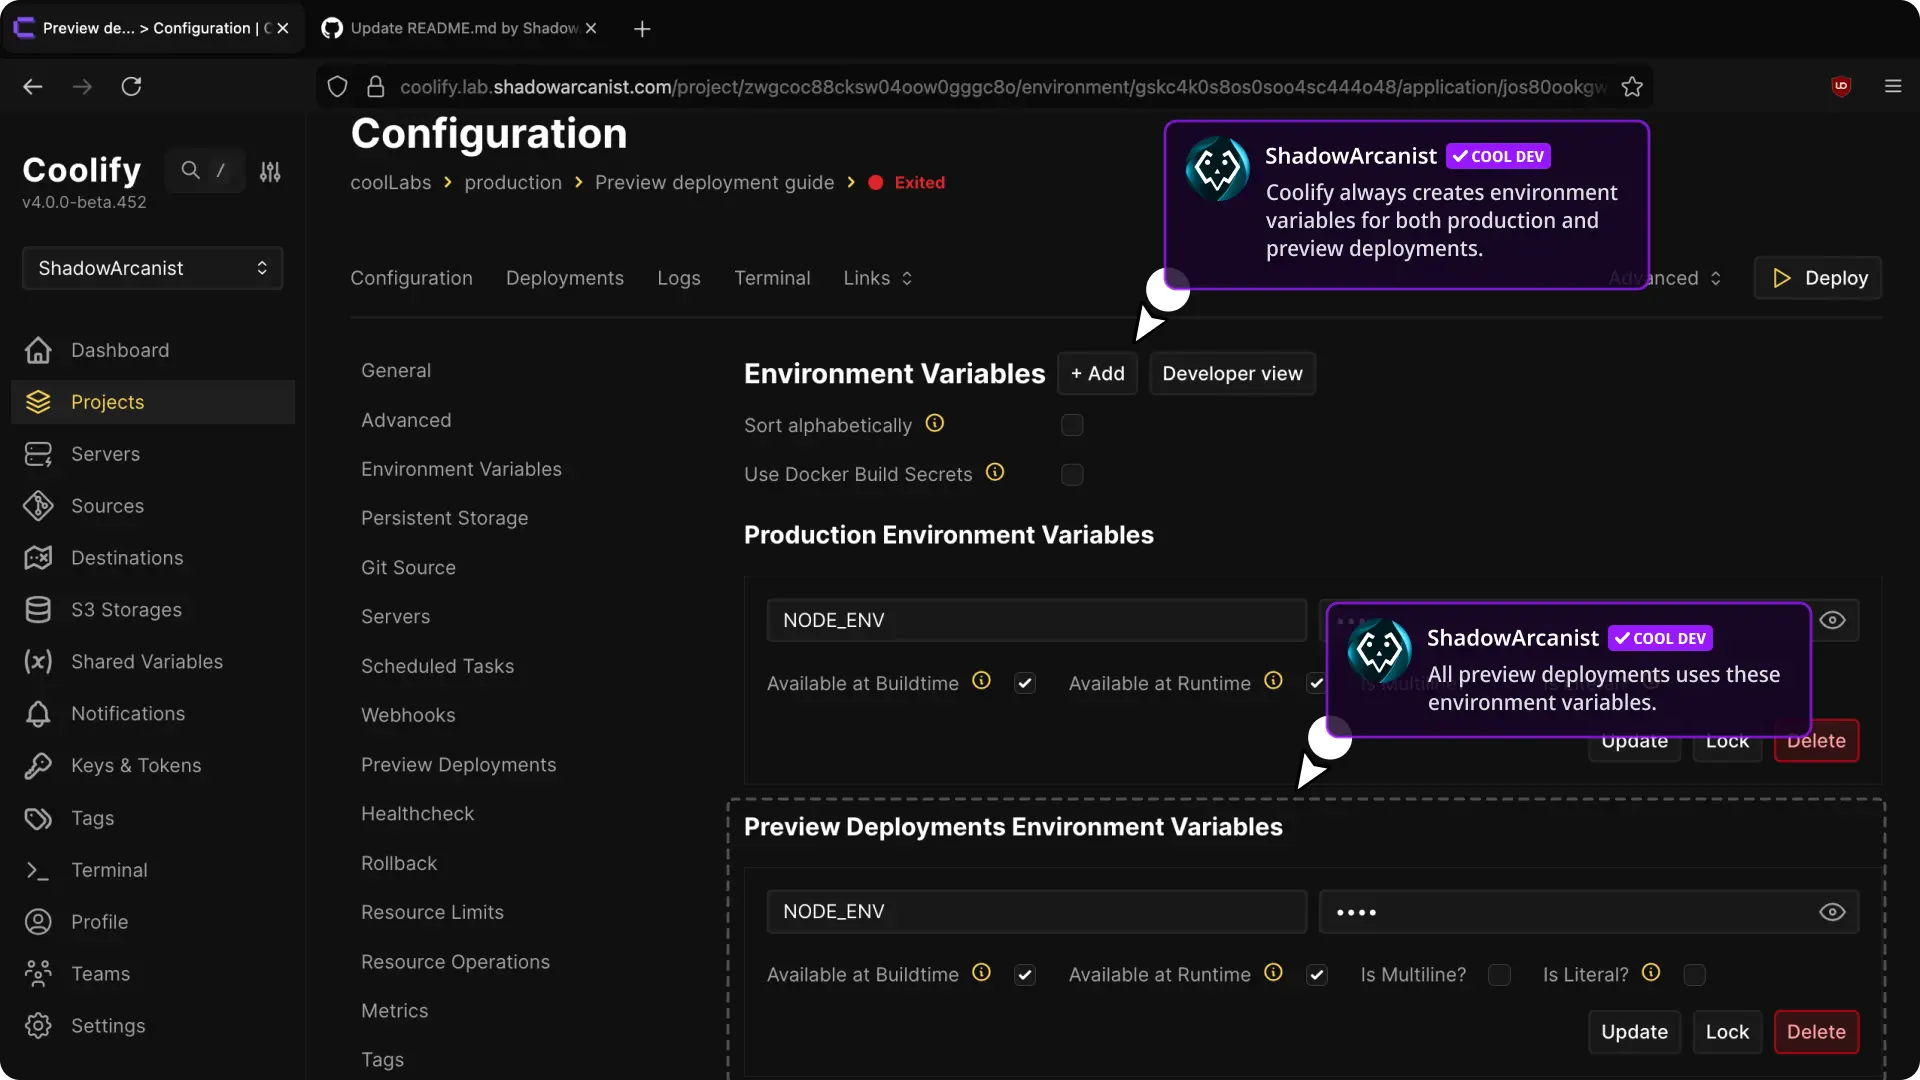
- Production Environment Variables apply to the main deployment.
- Preview Deployment Environment Variables apply to pull-request and merge-request deployments.
Use non-production credentials for preview databases, storage, and external services. A preview container is temporary, but data written to an external service can remain after Coolify deletes the preview.
Follow Environment variables for variable scopes and build-time values.
Load pull requests that were already open
Coolify does not automatically deploy pull requests that were open before previews were enabled.
For a GitHub-based application, open Configuration > Preview Deployments and select Load Pull Requests. Select Deploy beside each existing pull request that needs a preview.
GitHub pull-request comments
A GitHub App can add the preview deployment status and domain to the pull request, then update the comment when the deployment state changes.
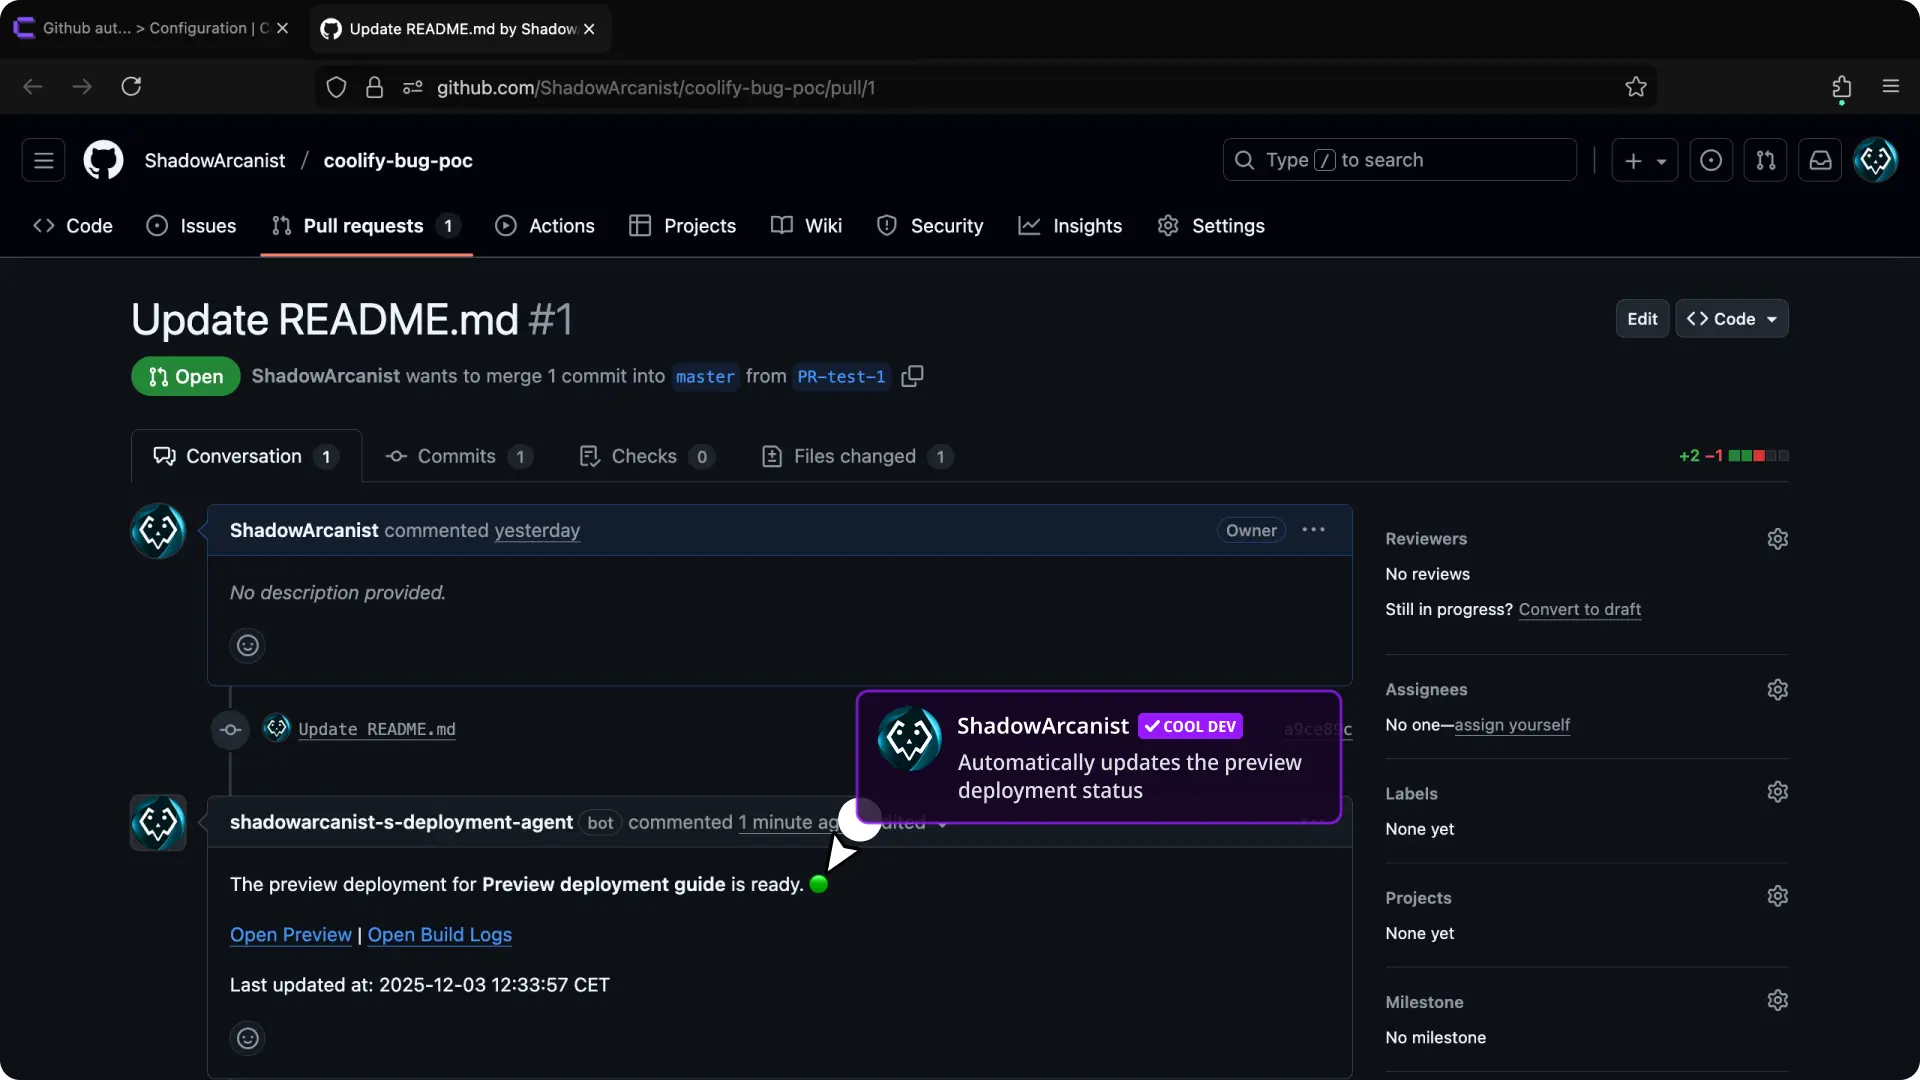
Manual repository webhooks can trigger previews, but automated pull-request comments require a GitHub App with the required permissions.
Deploy a Docker Image preview manually
For a Docker Image application, open Configuration > Preview Deployments and use Manual Preview Deployment.
Enter:
- Pull Request Id: an identifier used in the preview name, domain, logs, and cleanup
- Docker Tag: the image tag to deploy, for example
pr_1234
Select Deploy Preview. This path is useful when an external CI system builds one image tag for each pull request.
Manage a preview
Open Configuration > Preview Deployments to view each preview and its domain, Git request, deployment logs, and application logs.
Depending on the preview state, you can:
- select Deploy or Redeploy
- select Force deploy (without cache)
- select Stop to remove its containers and other non-persistent runtime resources
- select Delete to permanently remove the preview deployment
Verify the preview lifecycle
- Open or update a pull request or merge request.
- Confirm that Coolify creates a separate preview deployment.
- Open the preview domain and test the proposed change.
- Close or merge the request.
- Confirm that Coolify removes the automatically created preview.