
Deploy with Nixpacks
Use this guide to connect a Git repository, let Nixpacks detect the application, and deploy the generated image with Coolify.
Read the Nixpacks overview first when you need to decide whether automatic detection fits the codebase.
Deploy the application
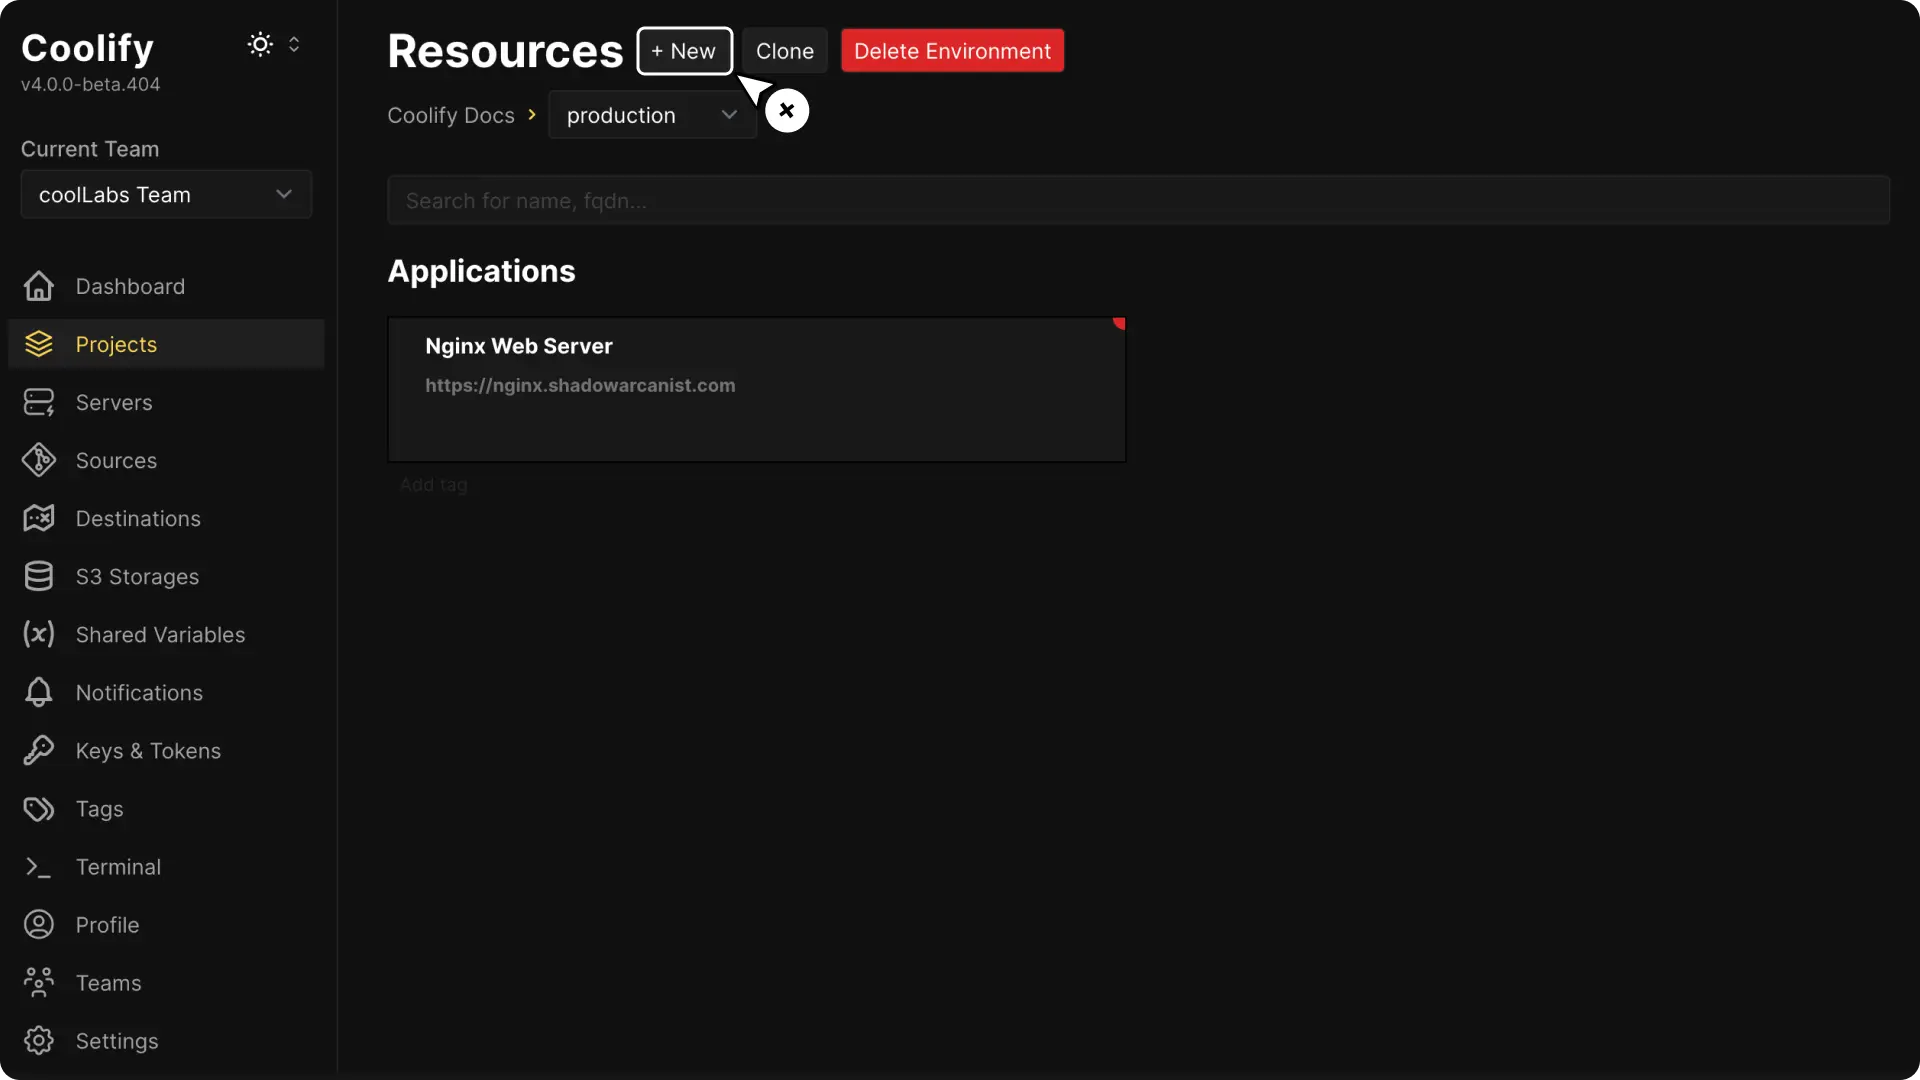
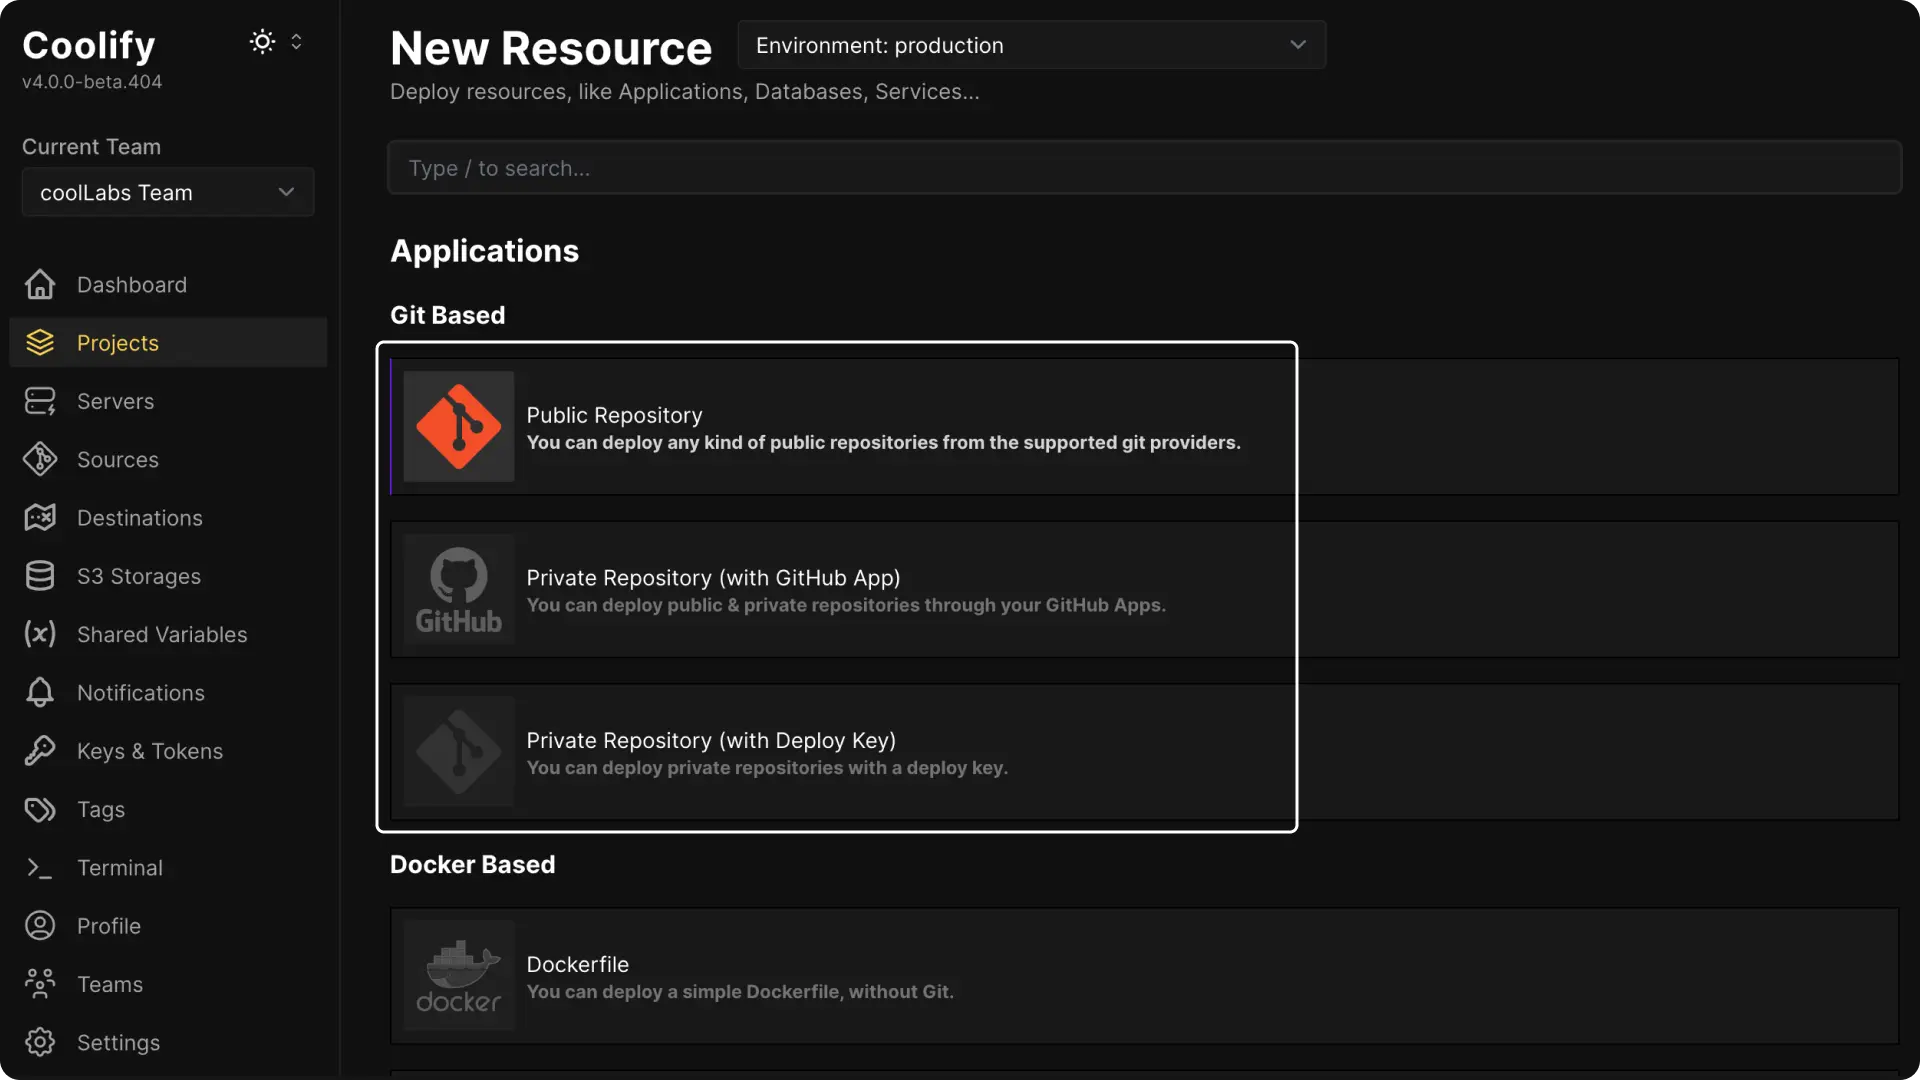
Connect the repository
Create an application from a public repository, deploy key, or supported Git App.
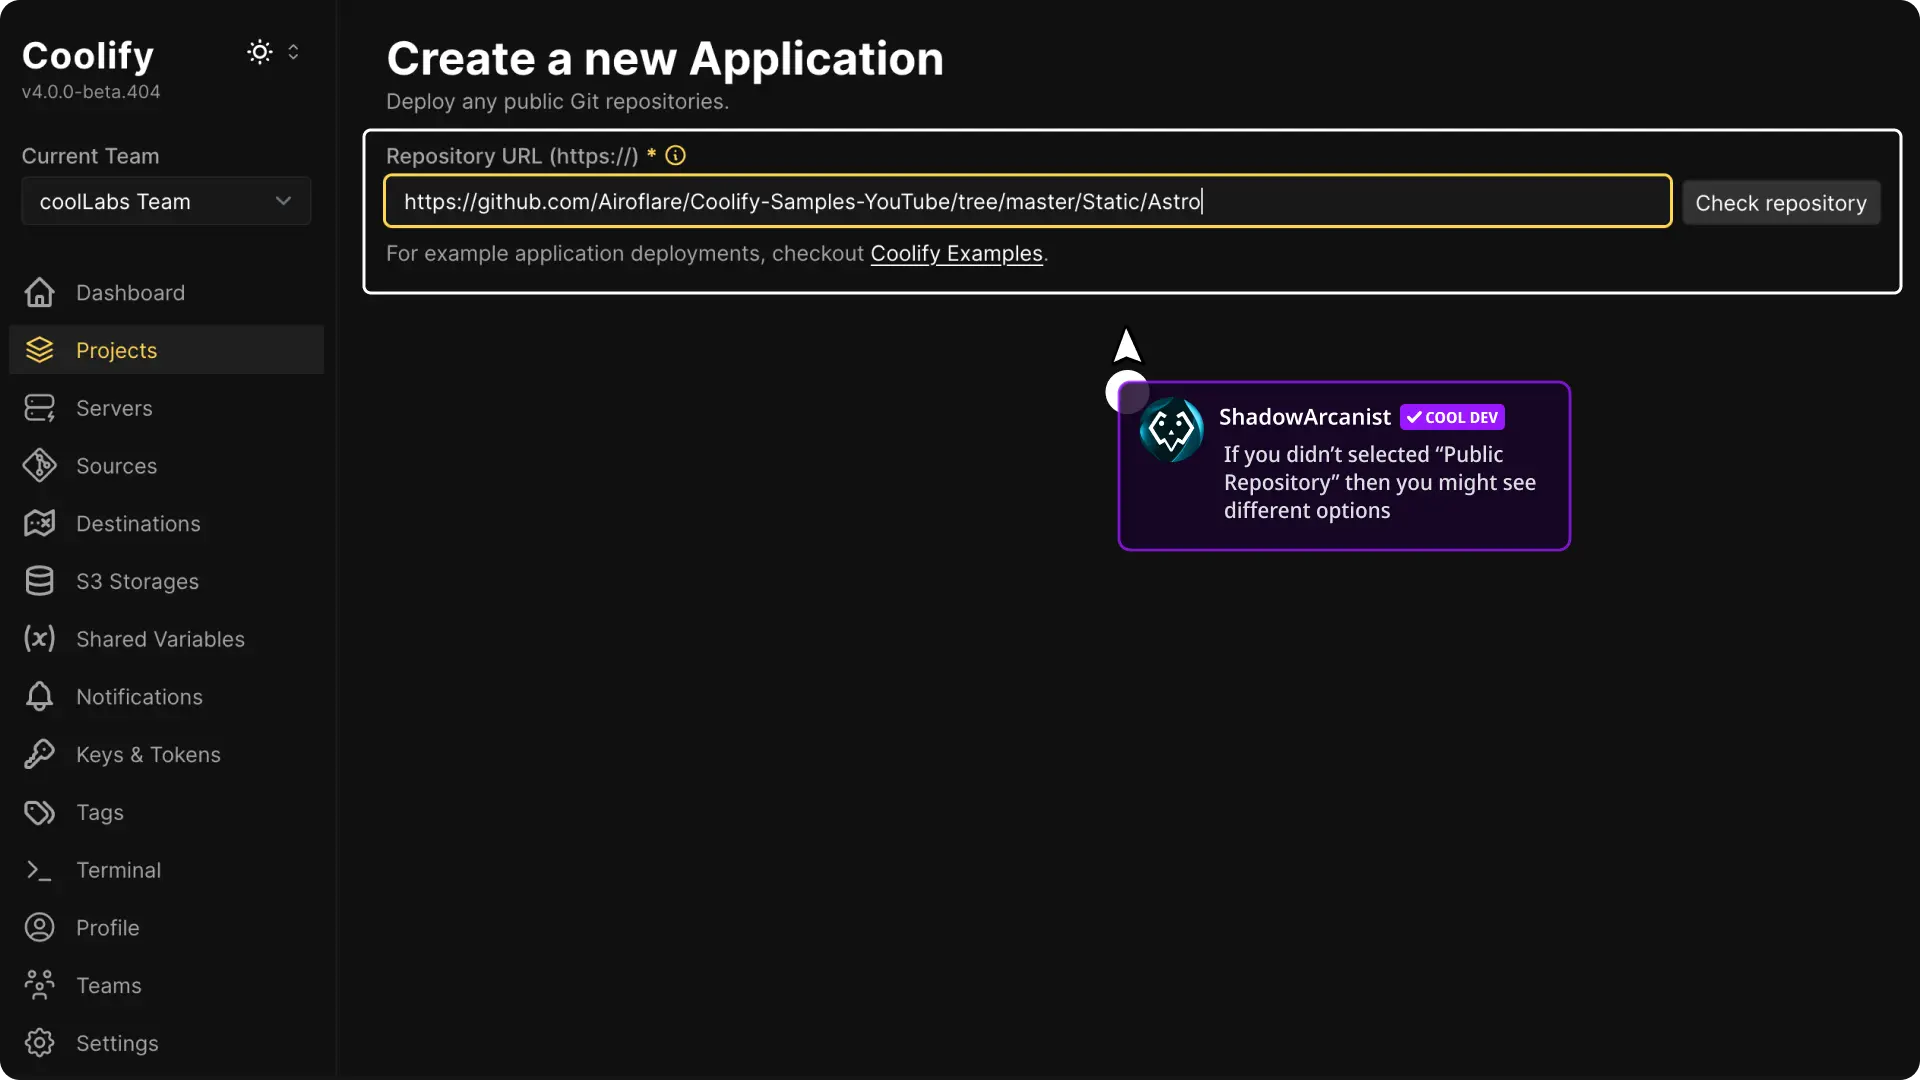
For a public repository, paste its HTTPS URL and select Check Repository.
Select the repository and branch.
Select Nixpacks
Choose Nixpacks as the Build Pack.
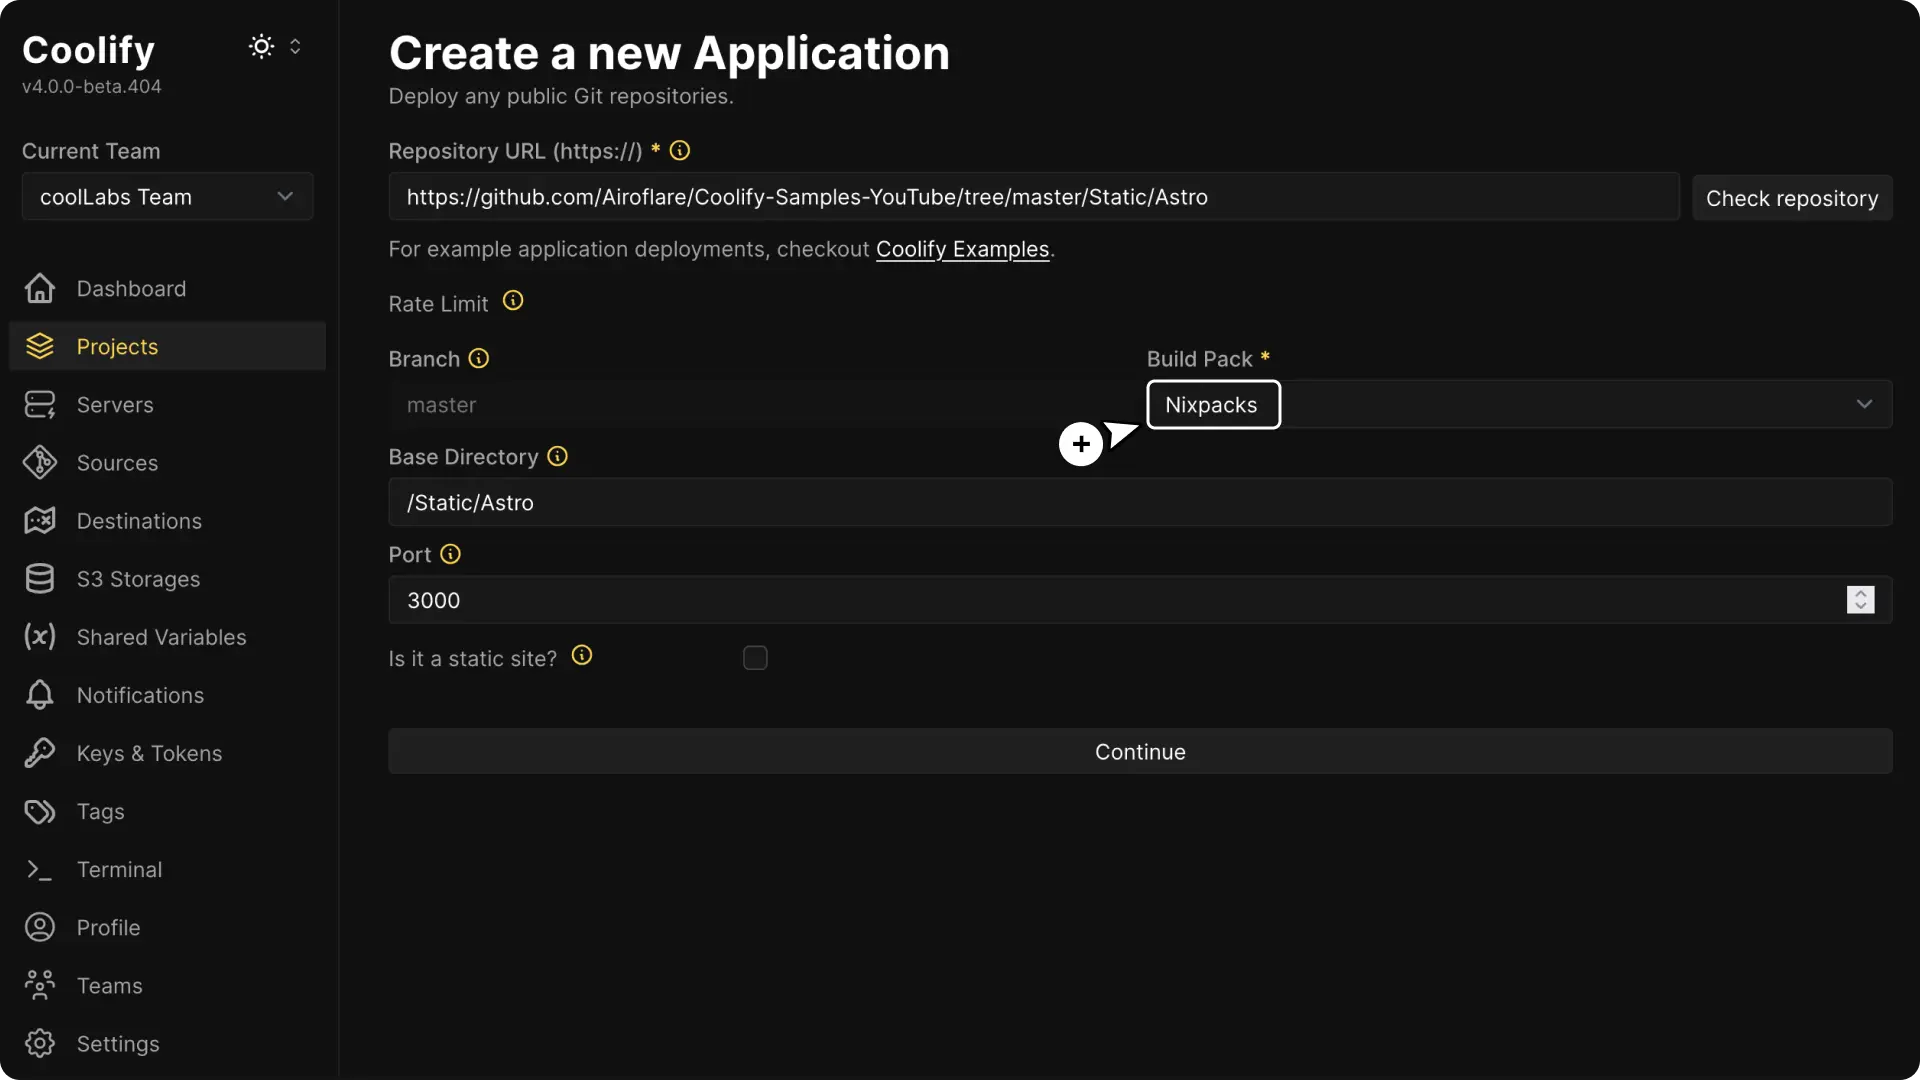
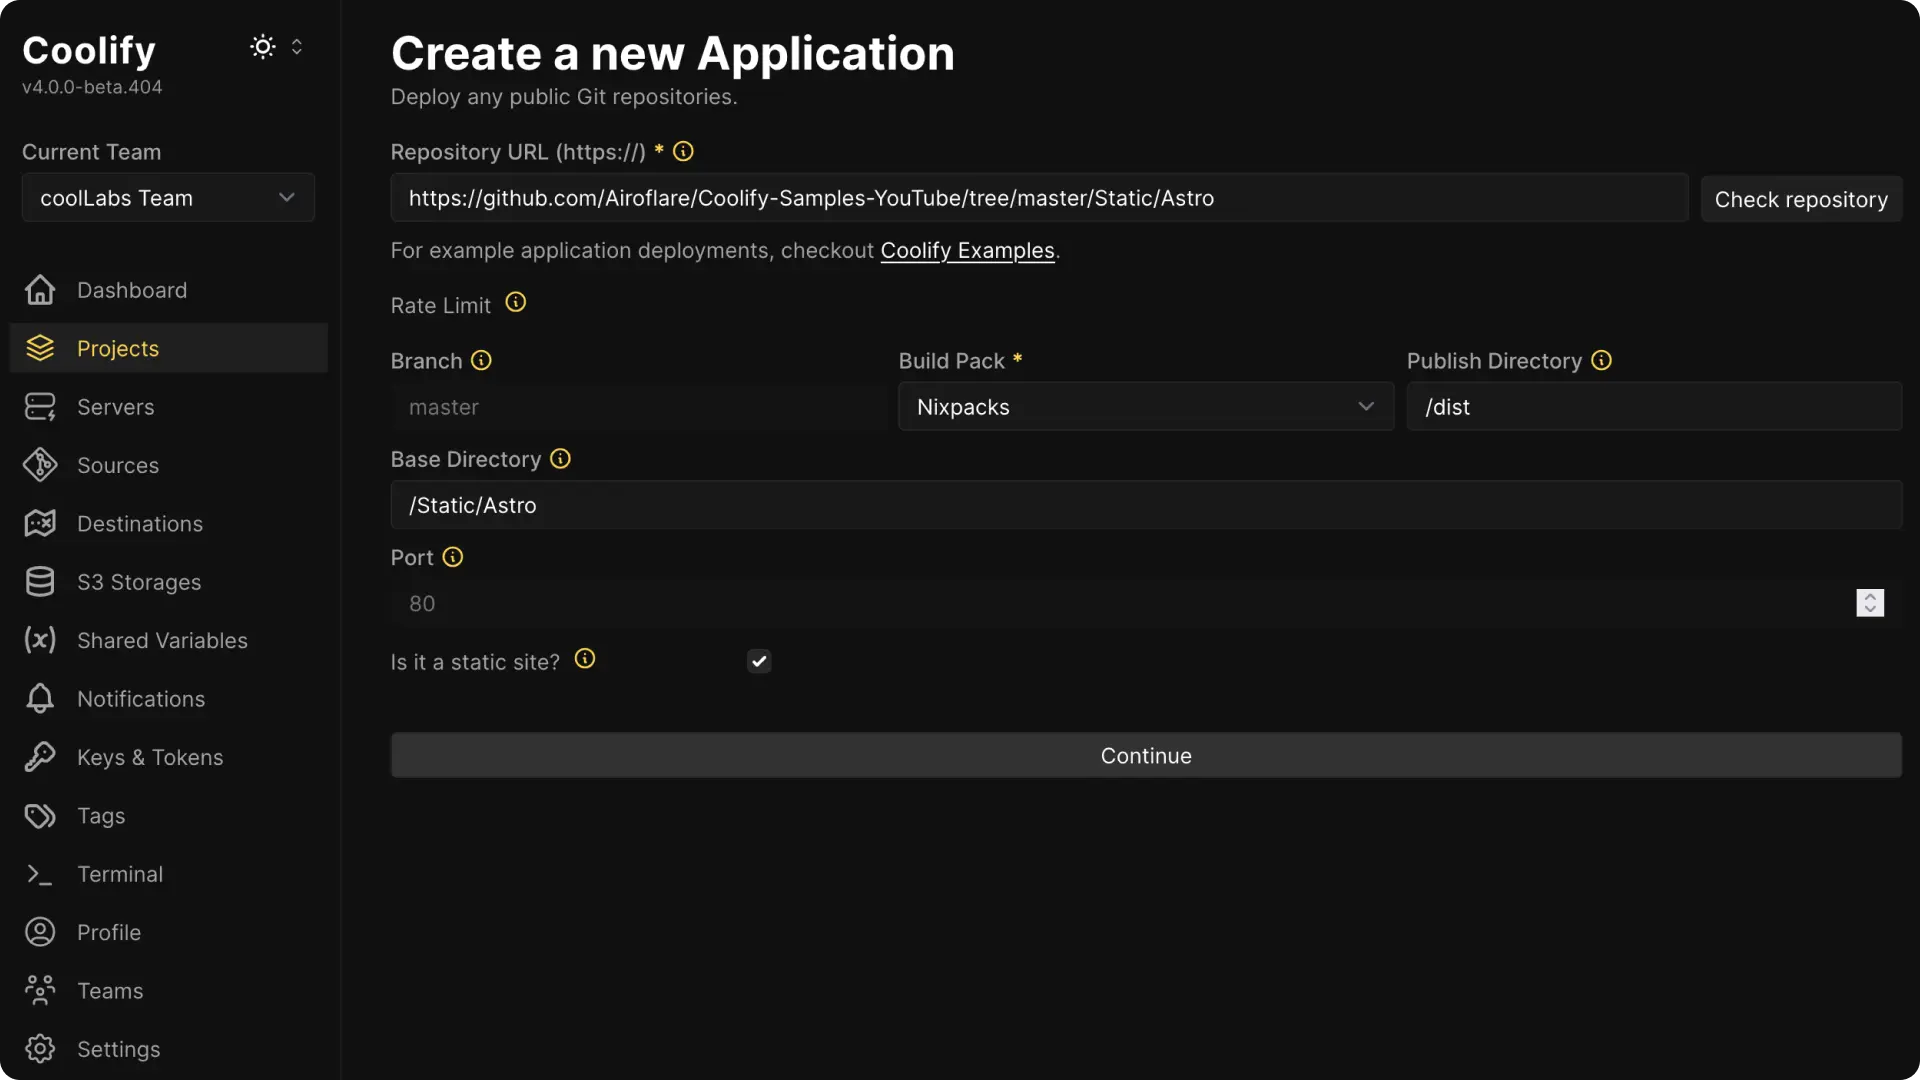
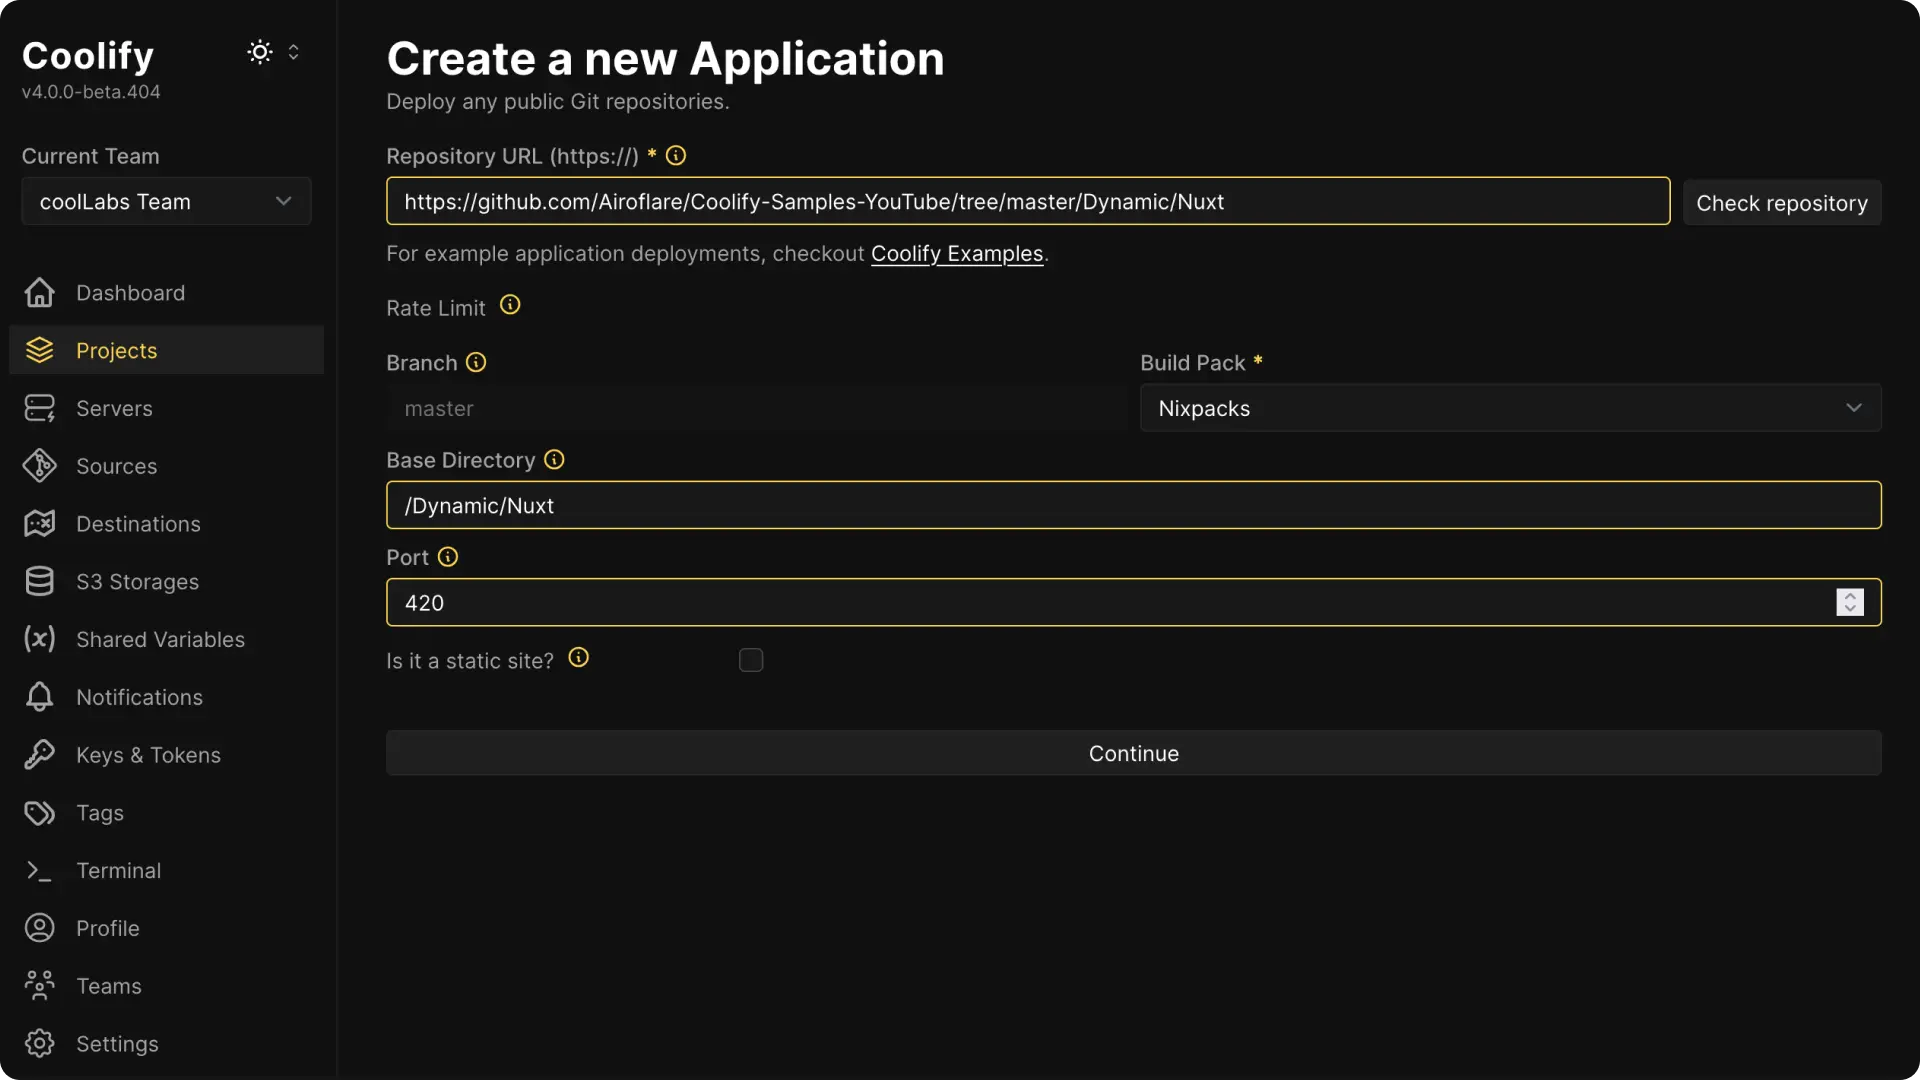
Set Base Directory to the directory Nixpacks should inspect. Use / for the repository root or a path such as /apps/api for an application in a monorepo.
Choose the application type
For static output:
- enable Is it a static site?
- enter Publish Directory, such as
/dist - keep the generated Nginx port
80
For a server application:
- leave Is it a static site? disabled
- enter the internal port where the process listens
Add environment variables
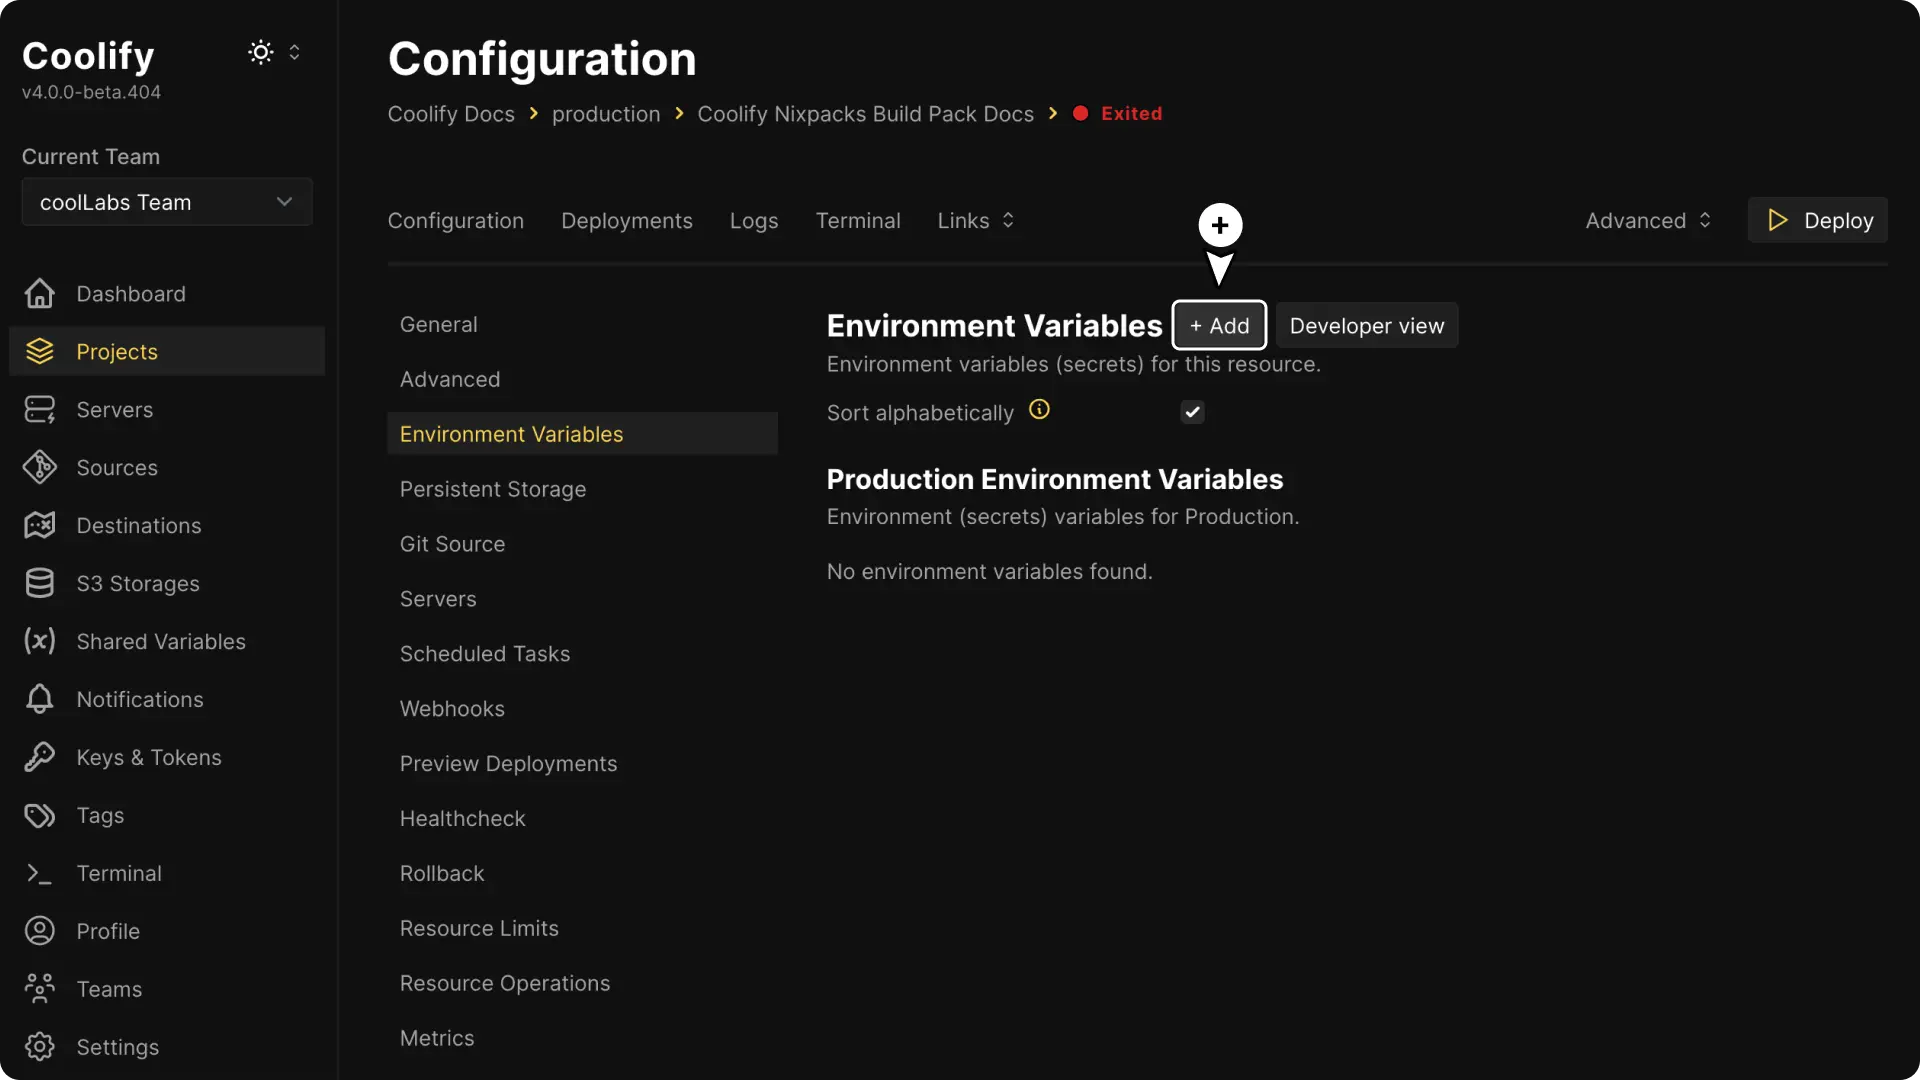
Continue to the application and open Configuration > Environment Variables.
Add the values required by the application. Enable Build Variable for values that the build command must read.
Review the detected commands
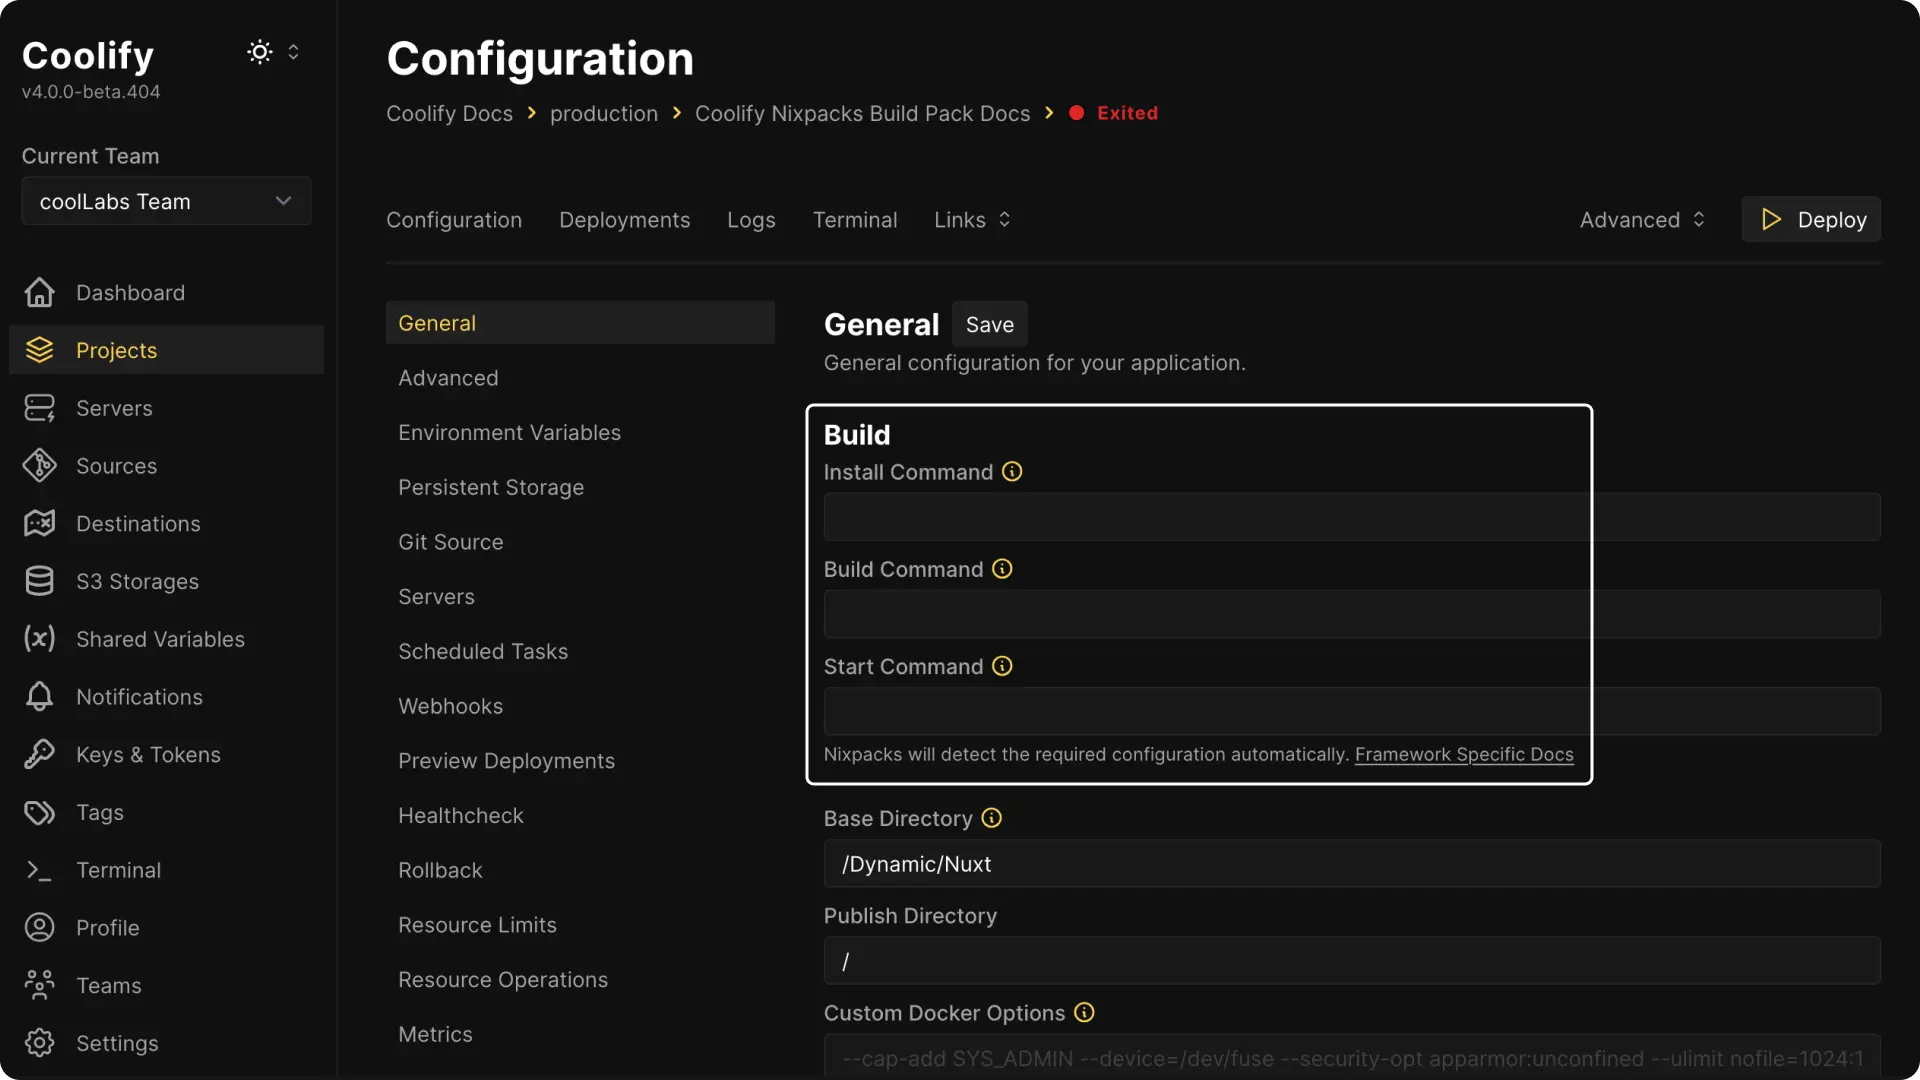
Open Configuration > General and review the detected Install Command, Build Command, and Start Command.
Override a command only when detection is incorrect or the codebase requires a custom command.
Deploy and verify
Configure a domain when the application should be public, then select Deploy.
Inspect the deployment log to confirm which providers, packages, and commands Nixpacks selected.
For a server application, open the application logs and confirm the process listens on the configured internal port. For a static application, open the domain and verify the generated assets and a client-side route.
Configure static output
Coolify uses Nginx to serve a static Nixpacks build.
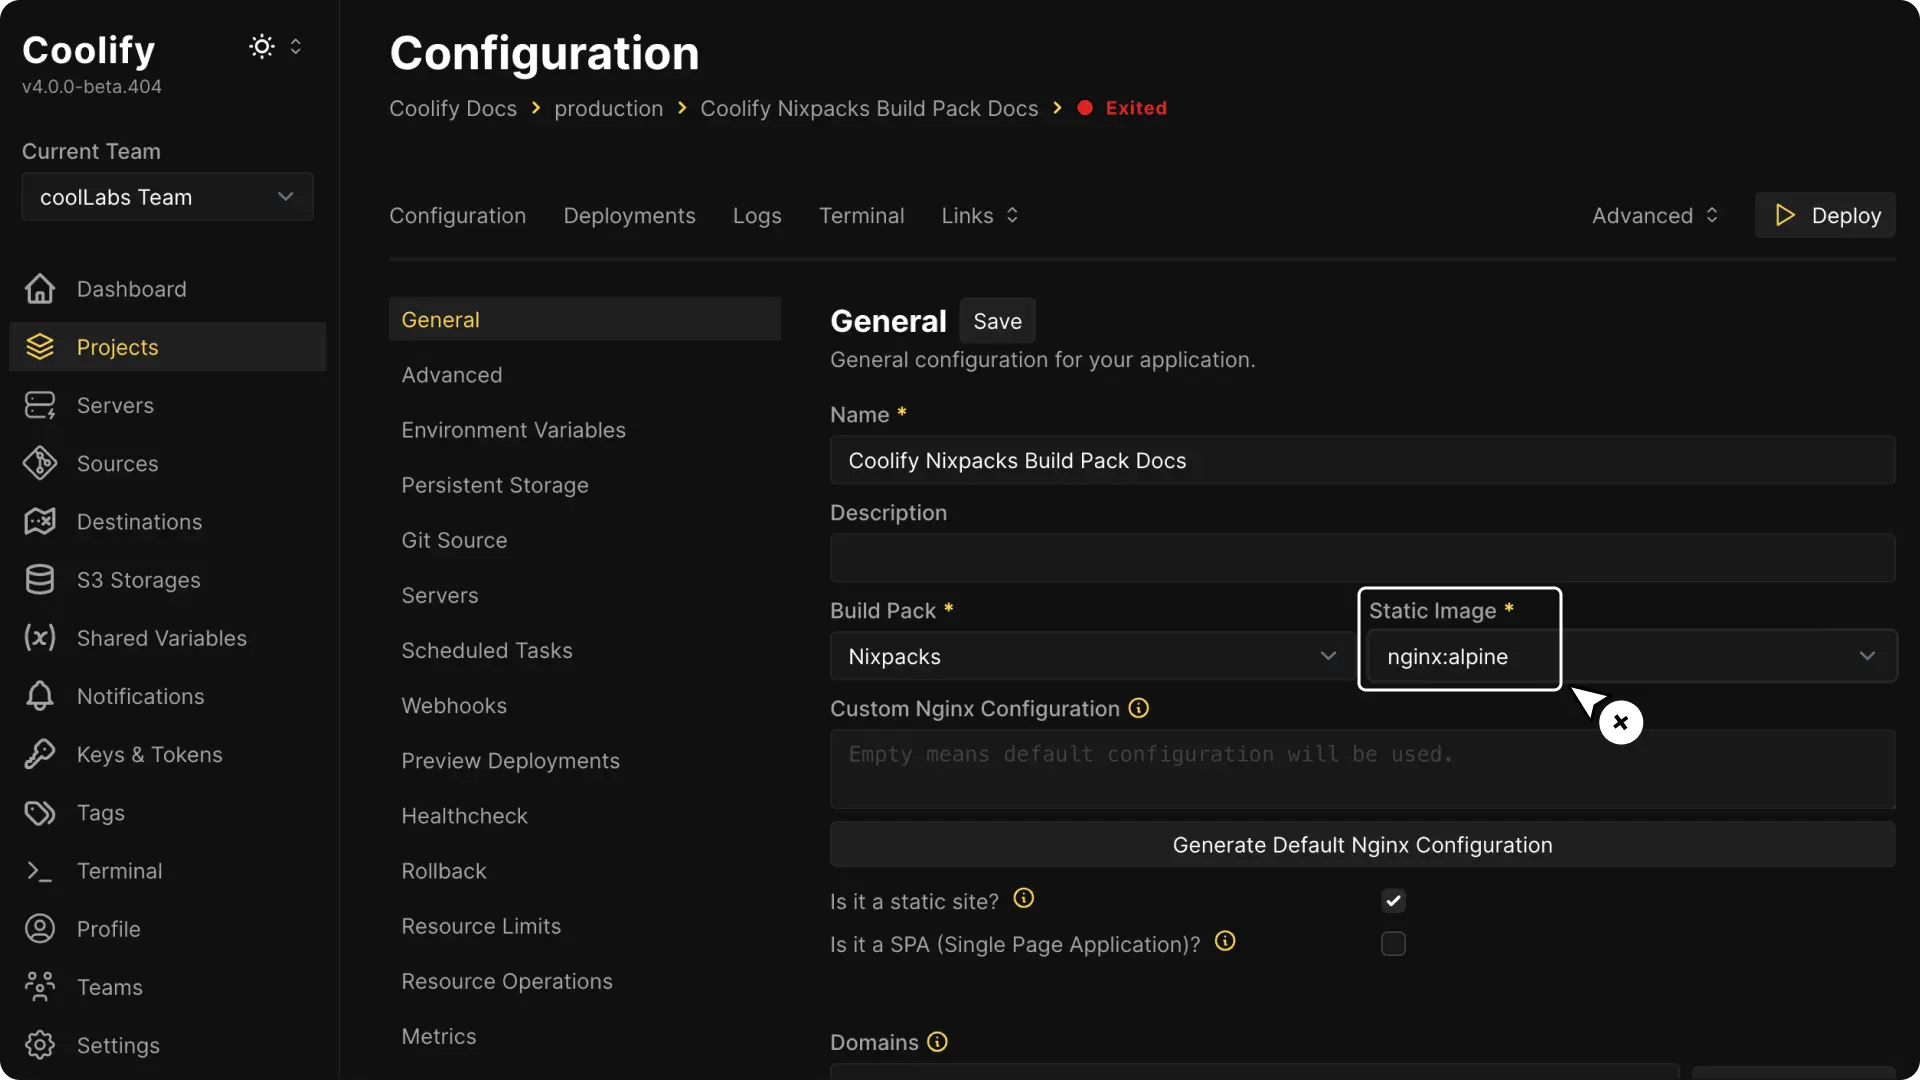
Use Configuration > General > Nginx Configuration only when the site needs behavior such as single-page application fallback, custom headers, or caching rules.
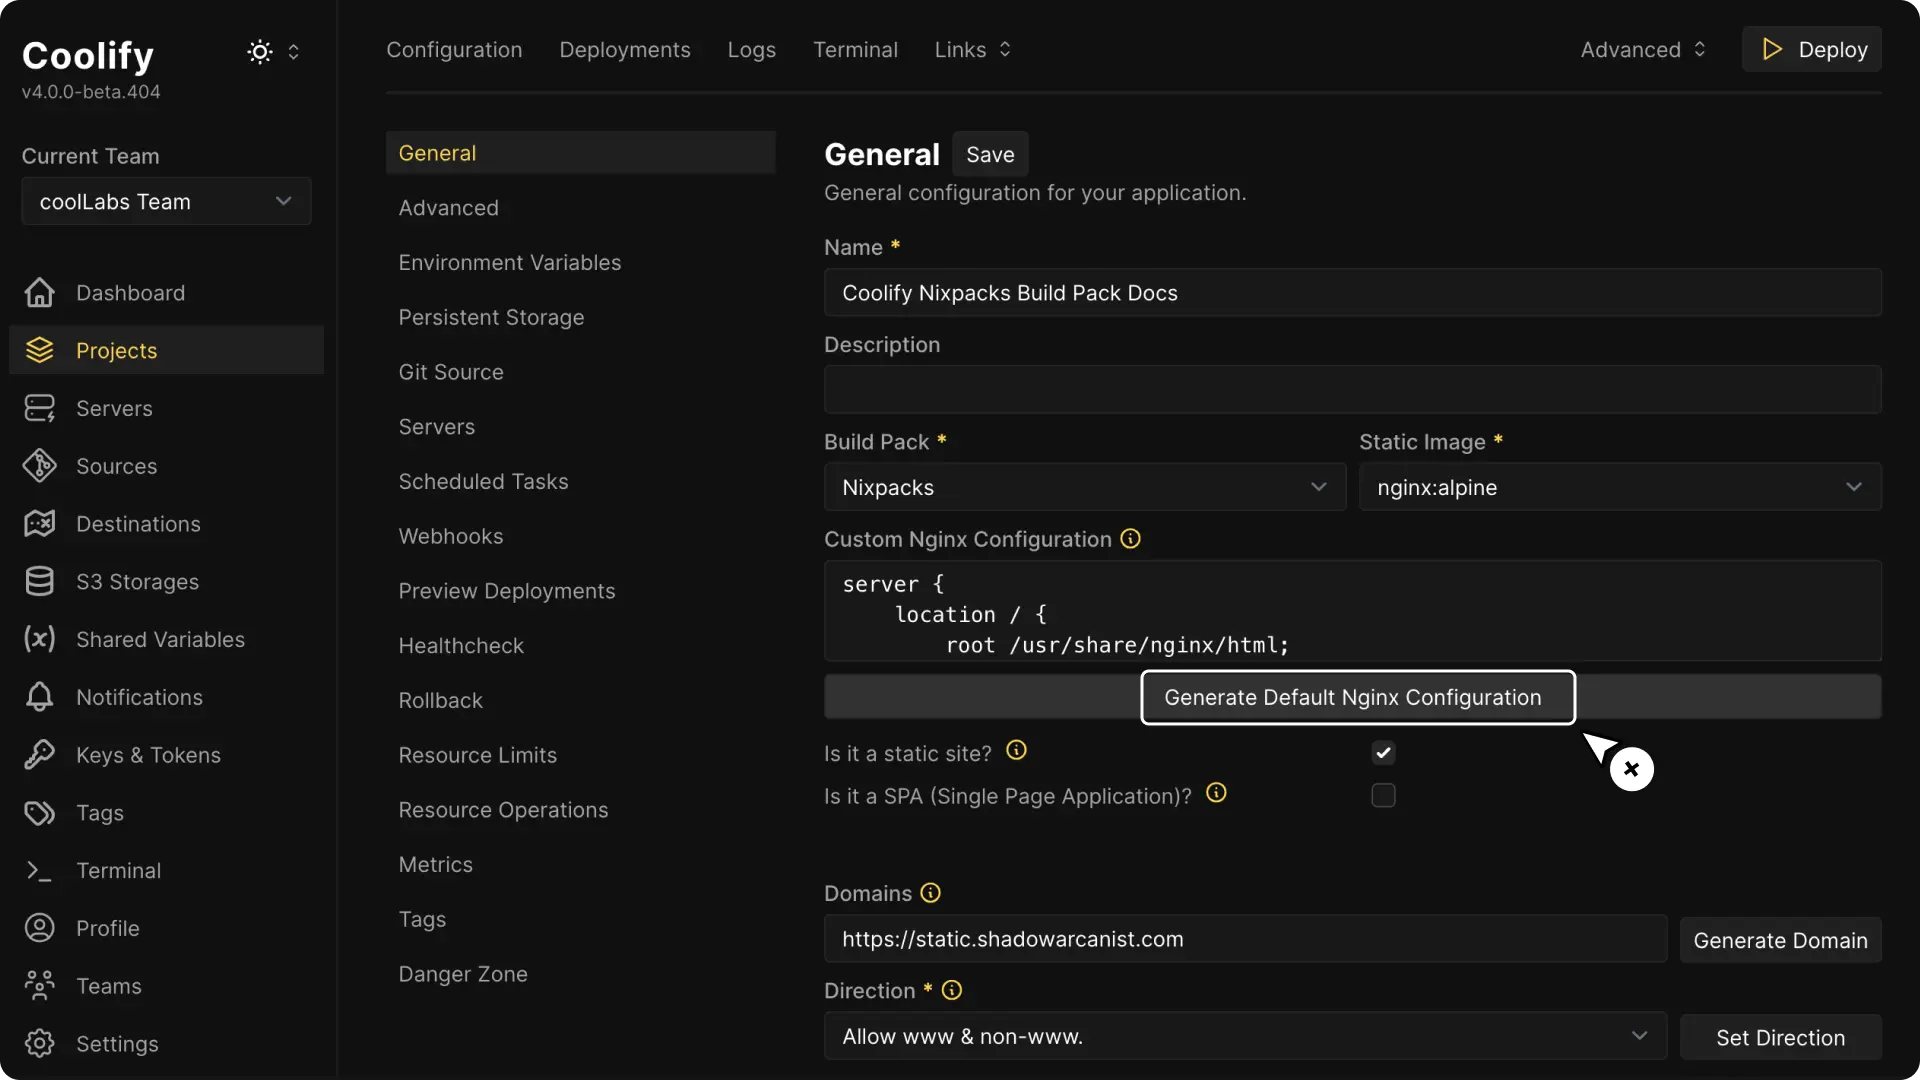
Save the change and redeploy the application. Coolify copies the Nginx configuration into the final static image during the image build, so a restart that reuses the existing image cannot apply the change.